I’ve tested 20 nutrition apps over the past two years, and MacroFactor is definitely my favorite (by a long shot).
However, like any diet tracking app, it can initially feel overwhelming until you get used to the layout.
So, if you’ve just downloaded MacroFactor (or are thinking about it), I want to share how to use it properly and some features that make a big difference when tracking your nutrition.
If you want to use MacroFactor before buying, use code FEASTGOOD to get an extra week on your free trial (two weeks total versus one).
A Quick Note
If you’re reading this article, I’ve assumed you’re already sold on using MacroFactor.
As such, I’m not going to discuss who should and should NOT use the app, the pros and cons, and how MacroFactor compares with other apps.
Read my in-depth MacroFactor review here if that’s what you want.
Getting Started With MacroFactor
1. Log In
MacroFactor offers several log-in options, including using your Apple ID, Google profile, and a classic email and password sign-in.
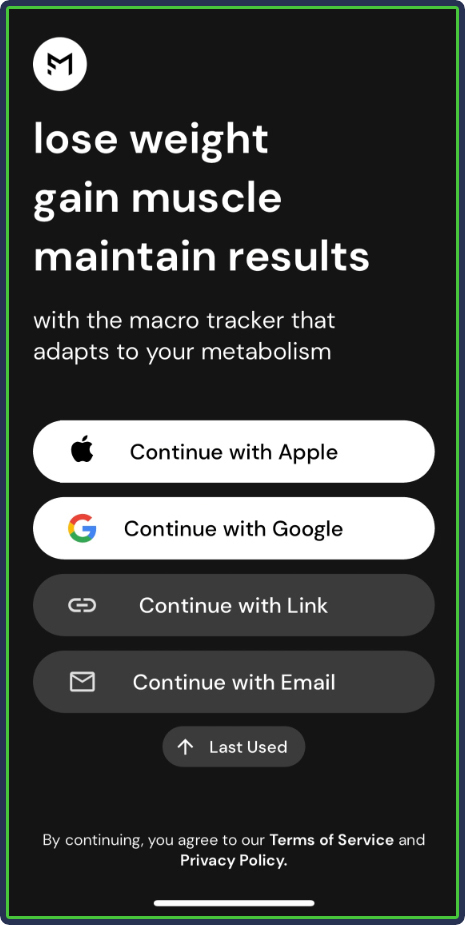
Once inside the app, you move on to setting up your profile.
2. Set Up Your Profile
This is where the fun part starts because it’s time to tell the app about yourself.
First, you can connect to Fitbit, Apple Health, or Health Connect to extract information like body weight.
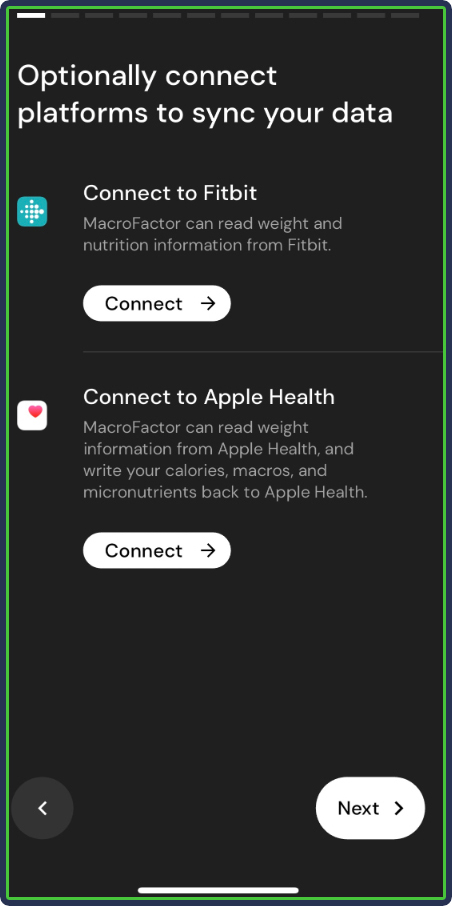
You must then answer a few basic questions about yourself:
- Gender
- Birth date
- Height
- Current weight
- Current body fat estimate (the app provides visuals that can help)
- How often do you exercise (0 to 7+ weekly sessions)
- How active are you (sedentary to highly active, measured in daily steps taken)
- Your experience level with cardio (none, beginner, intermediate, or advanced)
- Your experience with lifting (same categories)
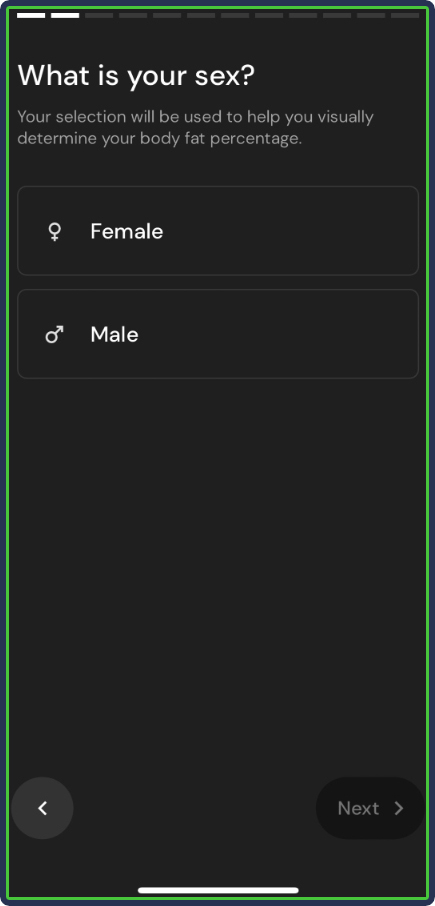
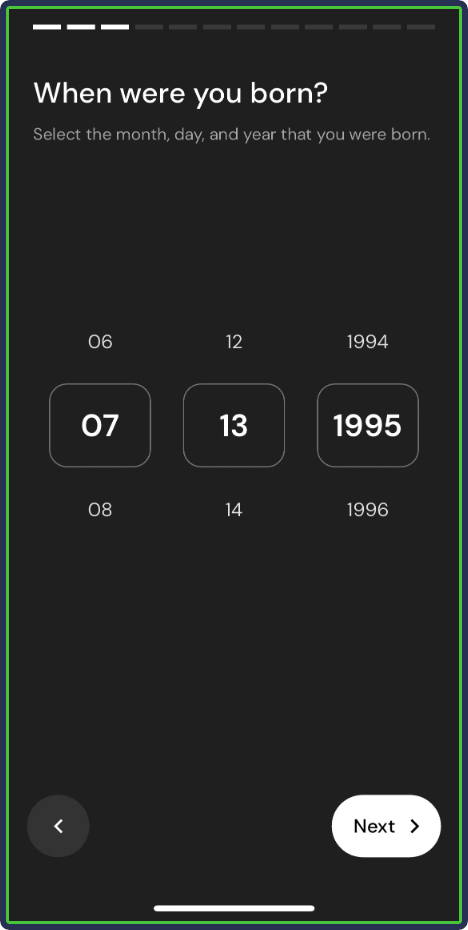
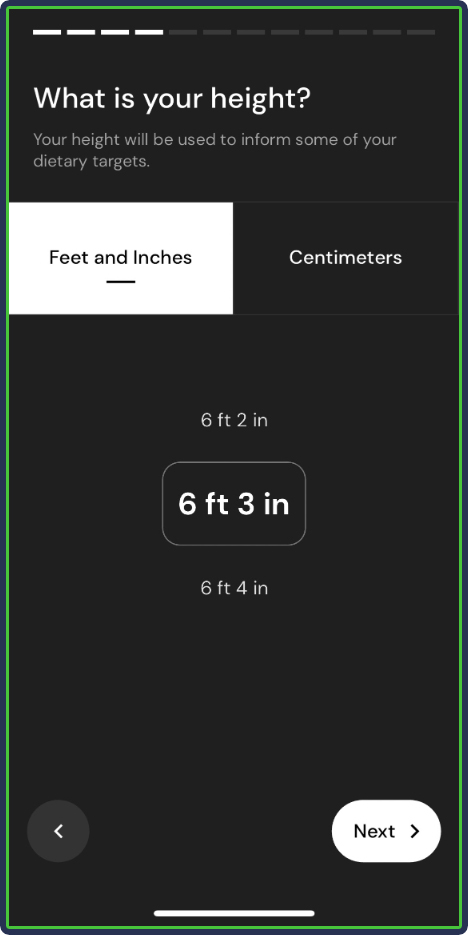
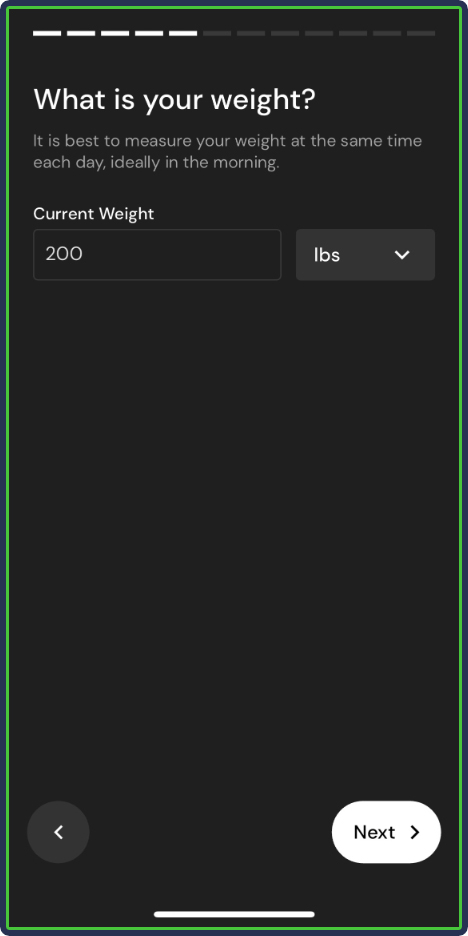
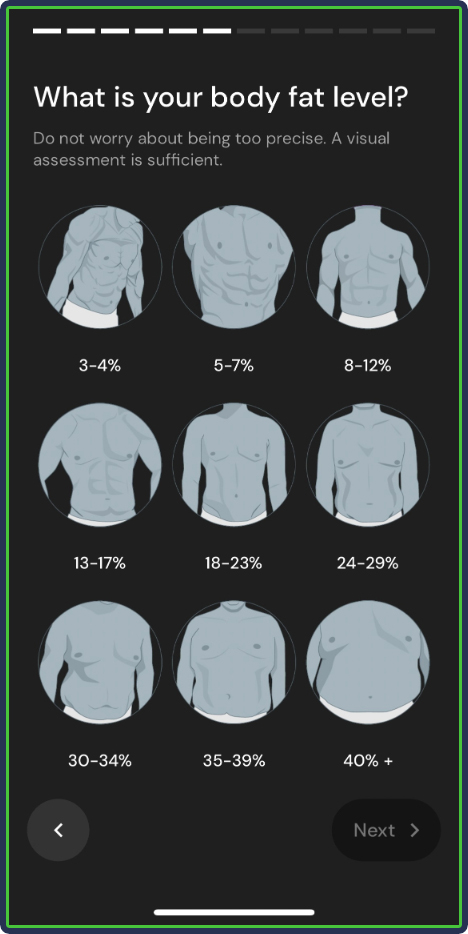
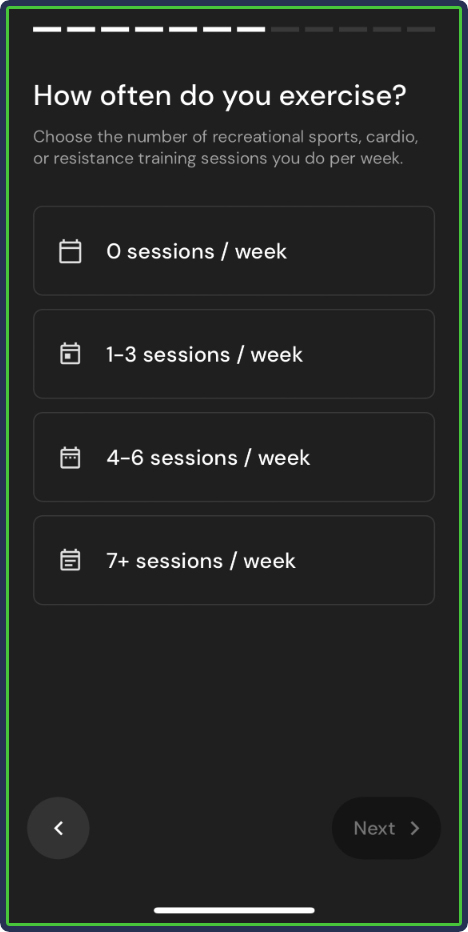
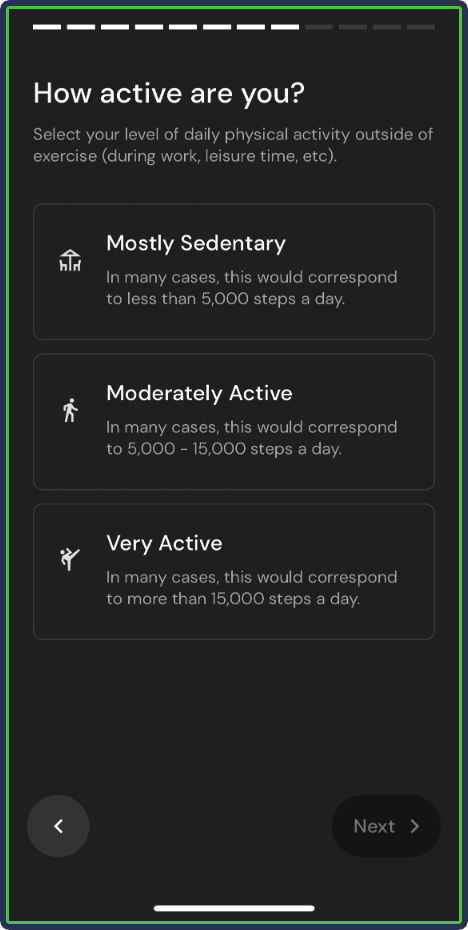
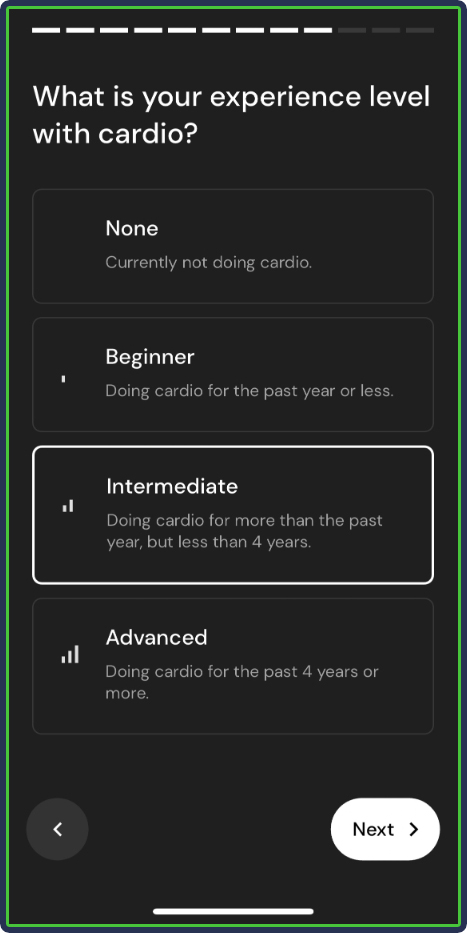
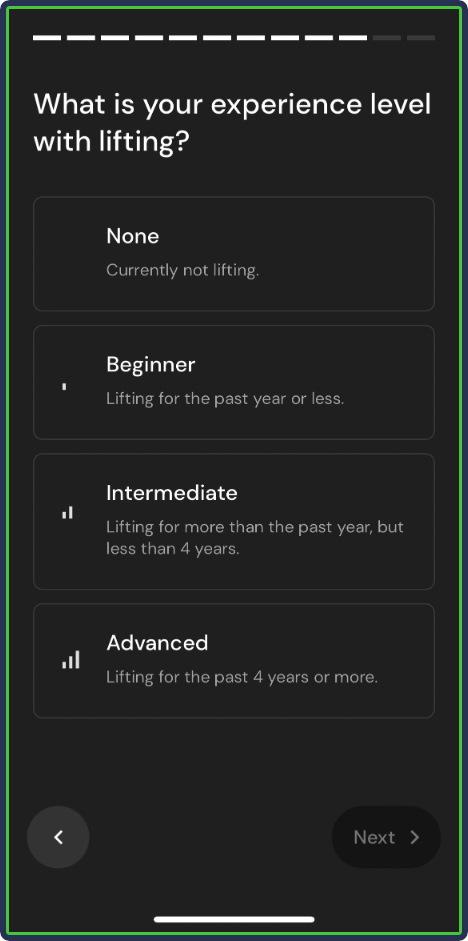
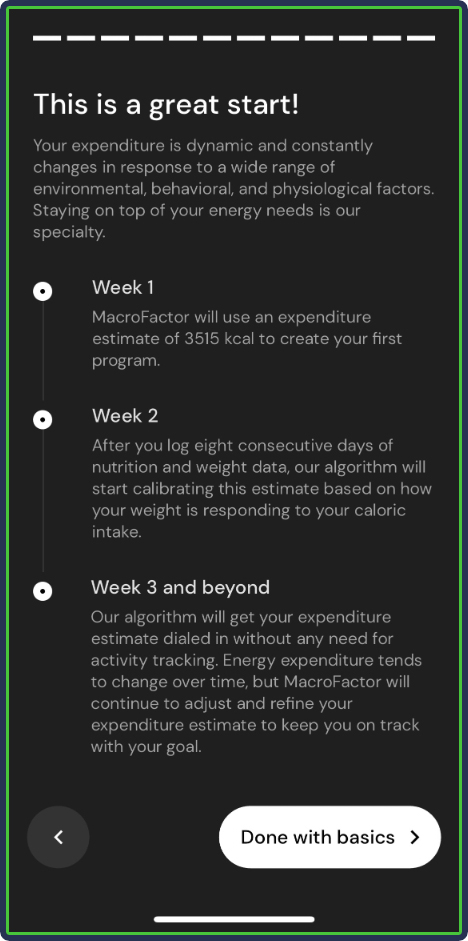
From there, the app estimates your initial calorie expenditure. If you think the app’s estimate is off and you have a rough idea of your energy expenditure, you can enter that value as a starting point.
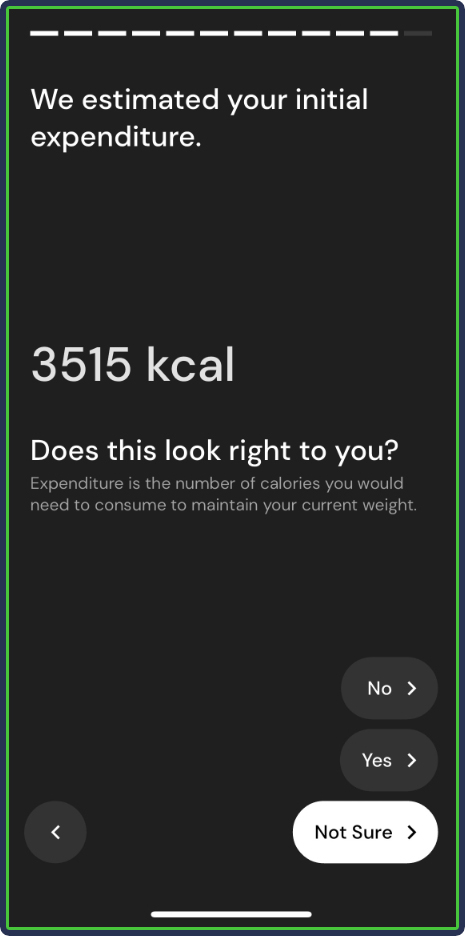
While setting up, the app also teaches you a few basics about nutrition, which is nice. These small nuggets of information can add up and provide a clear picture of how nutrition works.
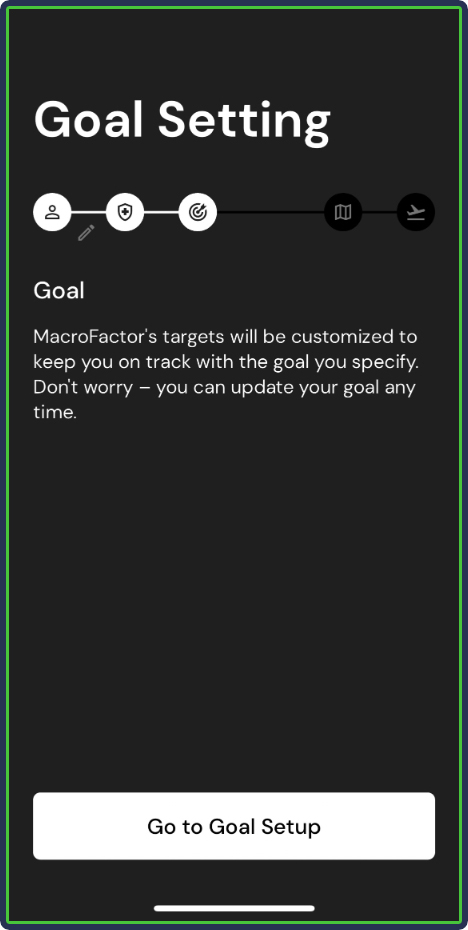
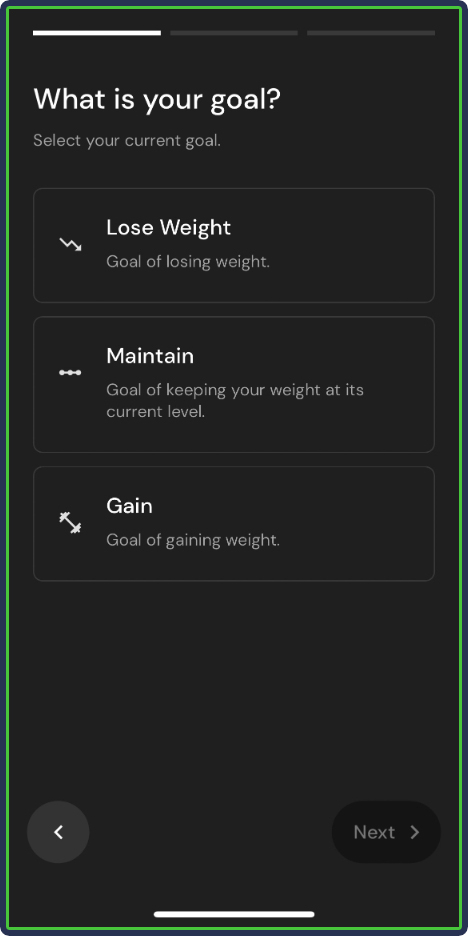
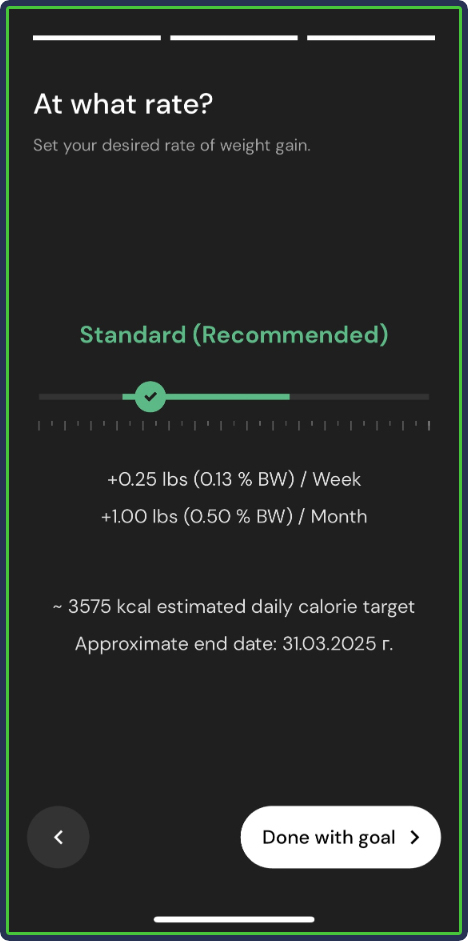
Then, it’s time to set a goal––lose, maintain, or gain body weight.
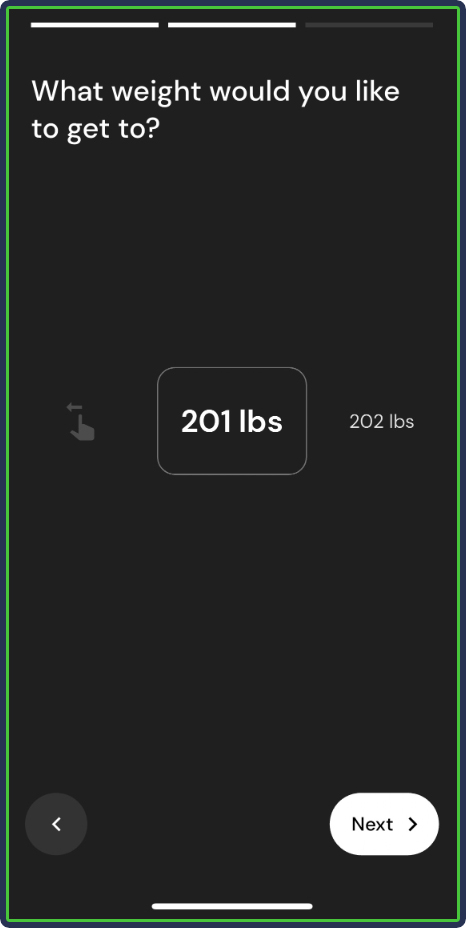
You can set a weight target and pick how quickly you want to get there. The app provides some recommendations for optimal weight loss/gain rates but ultimately gives you the freedom to decide.
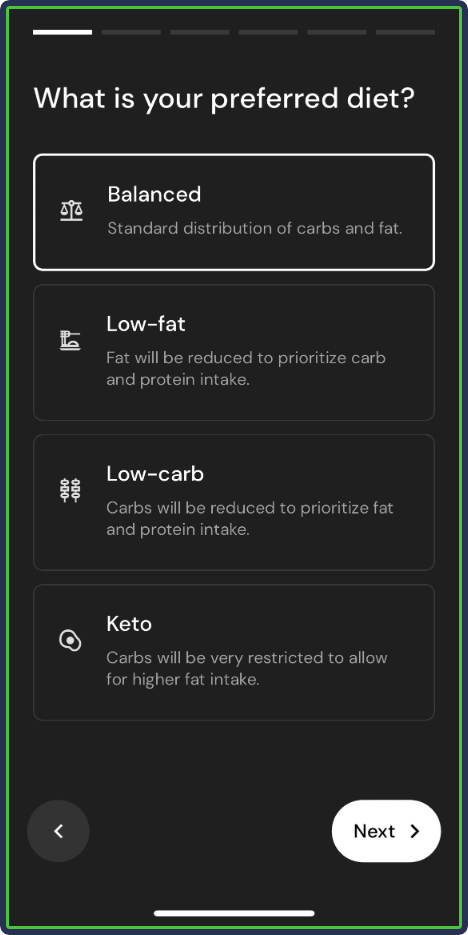
Finally, it’s time to set up your diet by answering a few more questions:
- Preferred diet style (balanced, low-fat, low-carb, or keto)
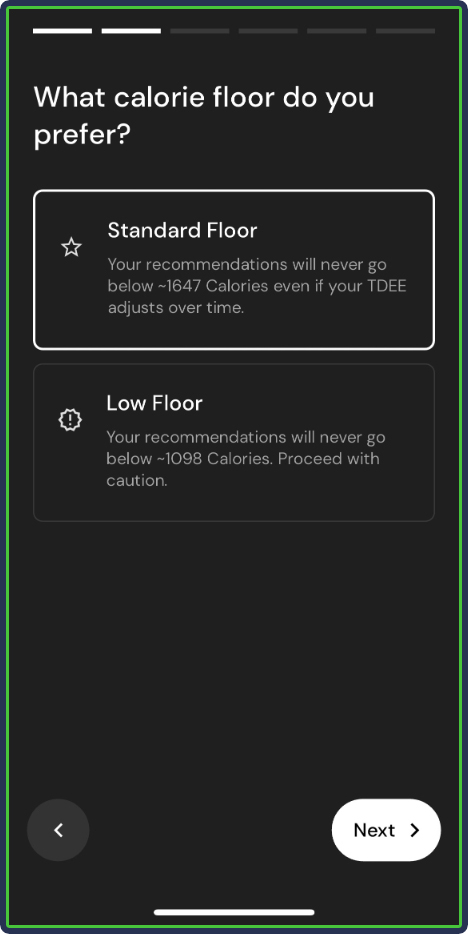
- Calorie floor (read my note below)
- What type of training will you do
- Whether you want to shift calories (i.e., having higher and lower calorie days)
- What is your preferred protein intake
Note: Calorie floor refers to the smallest calories the app recommends if you want to lose weight. I recommend sticking with the standard floor and choosing the low floor if you have extensive dieting and fat-loss experience.
I love this feature because it means the app will never recommend calories that are too low and potentially put you in ‘crash diet’ territory. This means you’re less likely to feel excessive hunger or be at risk of significant muscle loss.
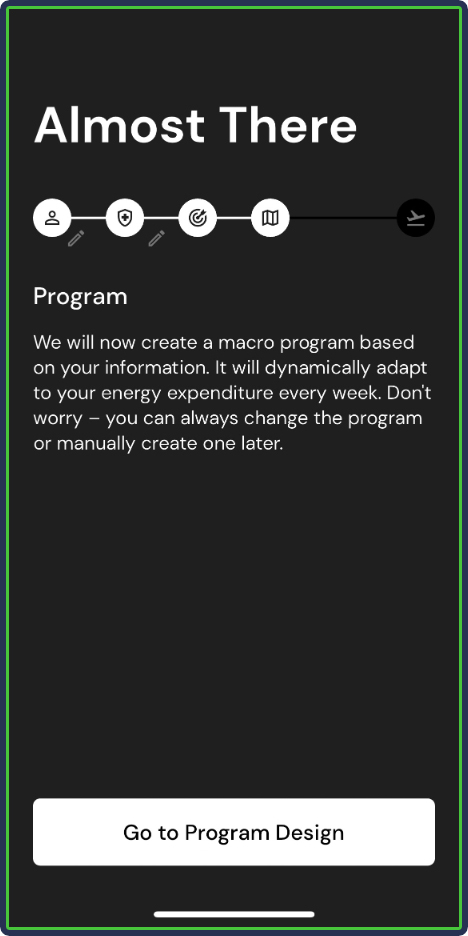
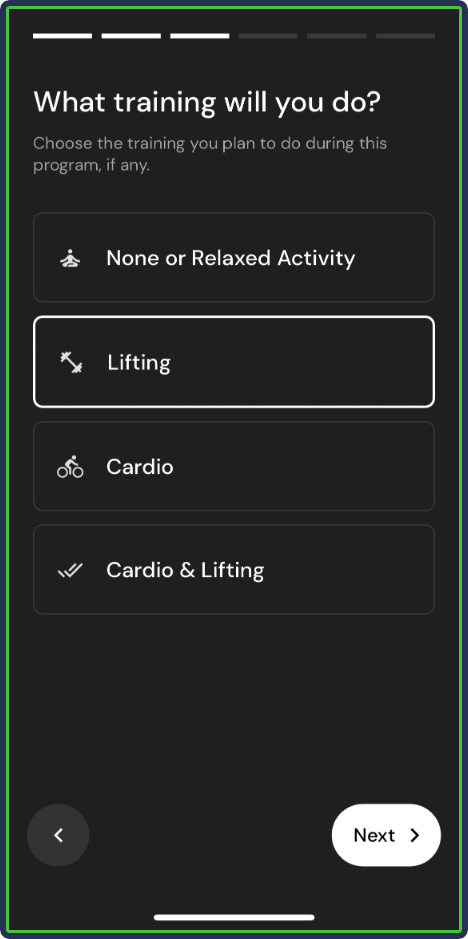
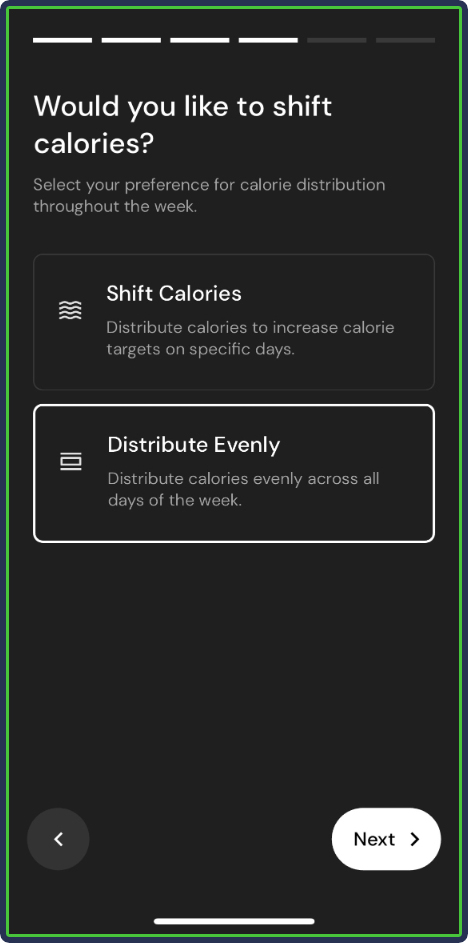
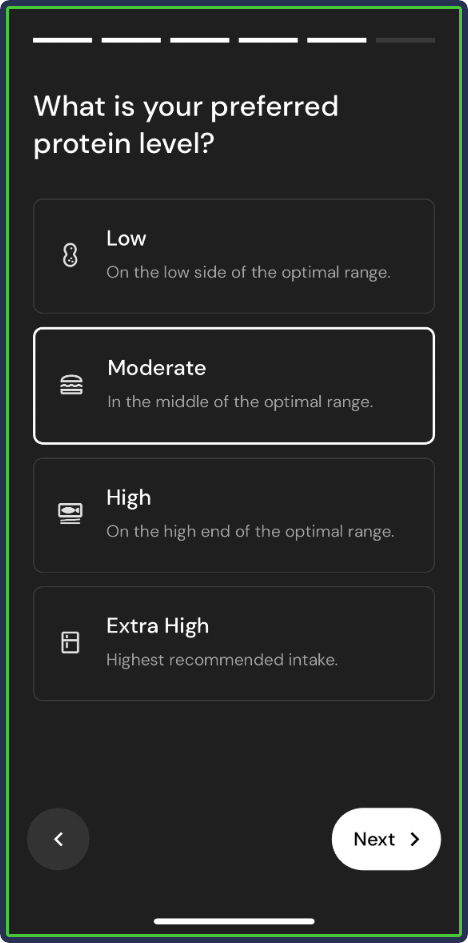
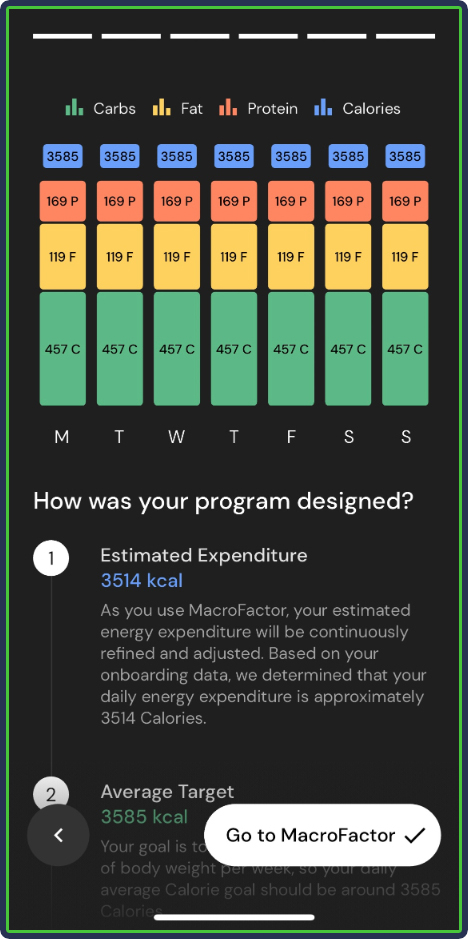
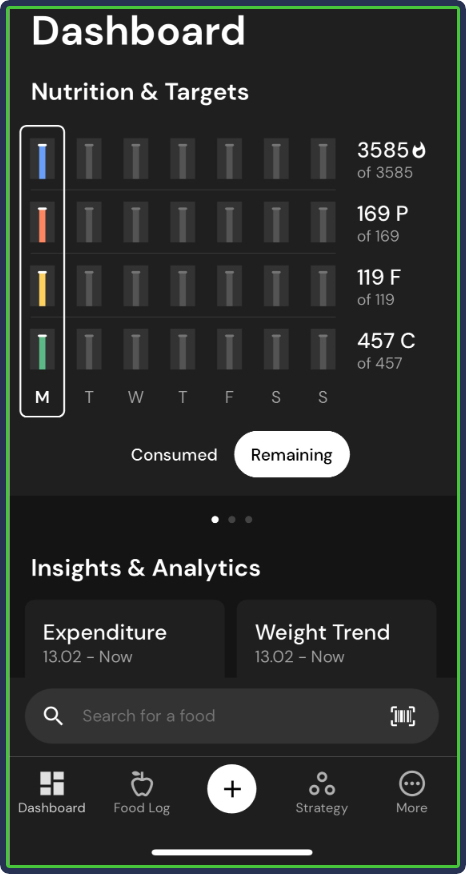
Once done with this process, which takes approximately 10 minutes, you’ll have access to your dashboard, which looks like this:
How to Use MacroFactor
As a minimalist, I don’t mind apps that offer many options so long as I can stick to the features I like and not get frustrated with things I don’t need or can’t understand.
MacroFactor is brilliant because it allows me to do the bare minimum to get the most out of it. At the same time, it never stops me from diving into more advanced features (more on those below).
So, let’s first discuss how to use MacroFactor without feeling overwhelmed, and I’ll then talk about the app’s fancier features (which are sometimes easy to miss).
1. Select Your Program Style
One thing that sets MacroFactor apart from other nutritional-tracking apps is the built-in coaching.
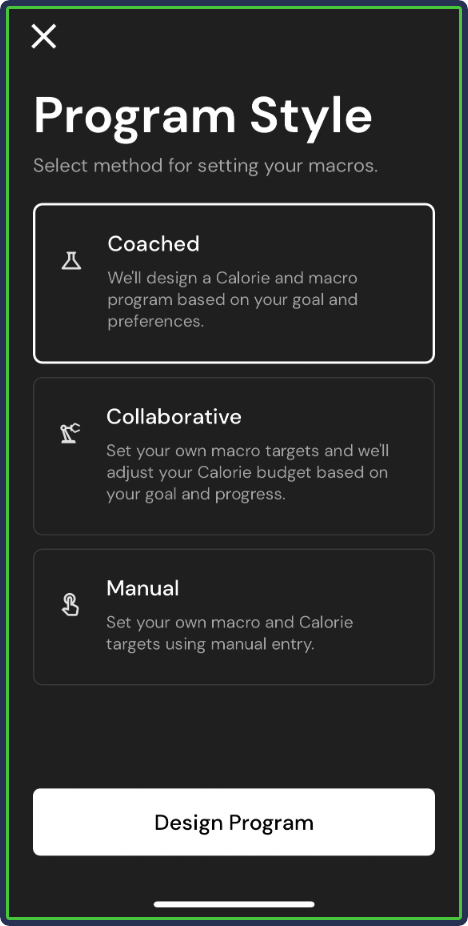
As a user, you get three options:
- Coached: The app does all the calculations for you and adjusts your calorie and macronutrient targets every week based on weight trends. This option is ideal if you’re unsure how to adjust your nutrition as you gain or lose weight or simply prefer the app to do the thinking for you.
- Collaborative: You set your macronutrient targets, and the app adjusts your calorie budget based on your goal and progress. This option is good if you want to maintain some control but still take advantage of MacroFactor’s built-in coaching.
- Manual – You set your calorie and macronutrient targets and manually adjust them when you see fit. This option is best if you’re experienced in macro tracking and prefer to control everything.
You will have the opportunity to pick a coaching style during the initial setup process.
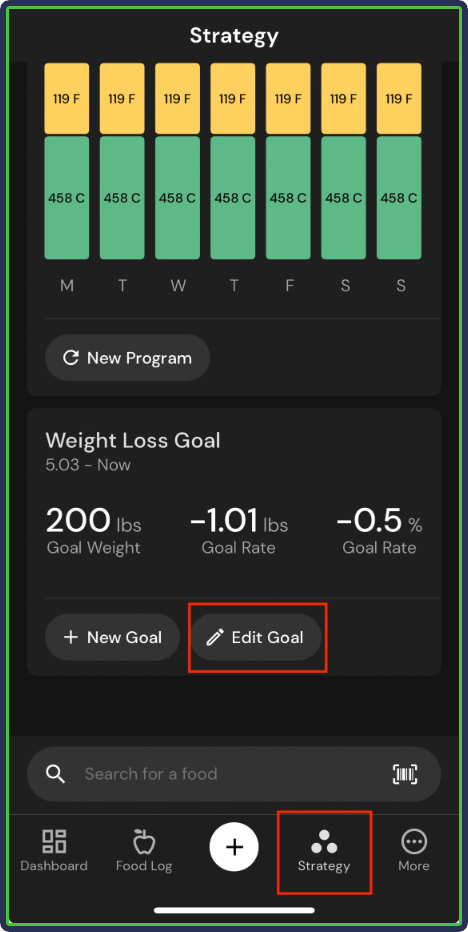
However, if you’ve picked a style without paying attention or you want to change the coaching style, you can do so by navigating to Strategy (bottom right) and scrolling to Edit Goal (or clicking + New Goal, more on which later).
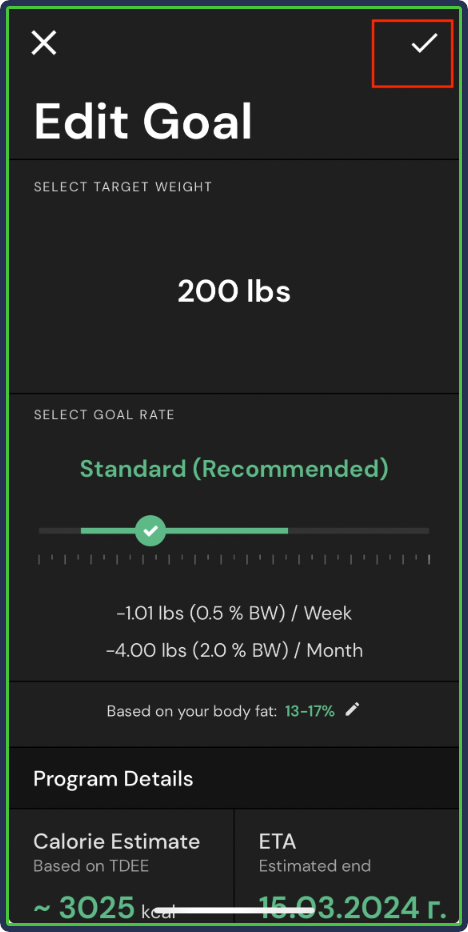
Adjust your goal and click the check icon on the top right:
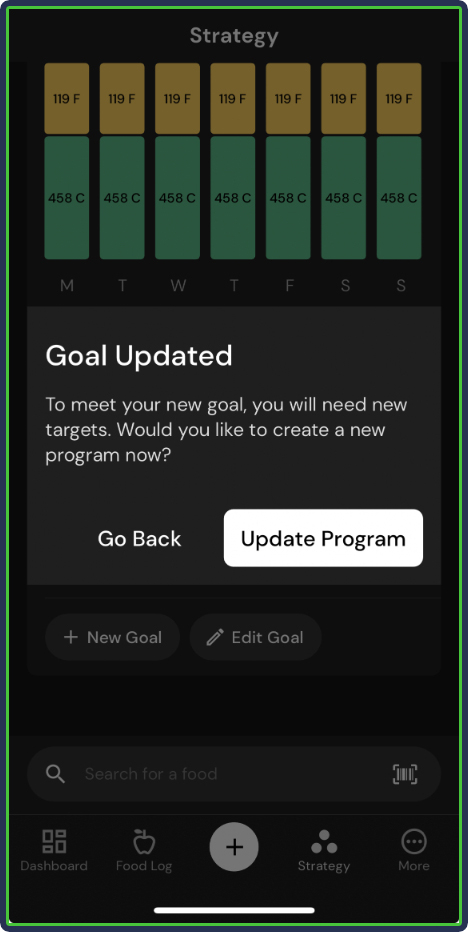
Click Update Program:
And select your preferred coaching style:
I’ve tested MacroFactor extensively, and its algorithm is incredibly accurate.
So, you can rest assured that you’ll get fantastic guidance and week-to-week updates on the Coached and Collaborative program styles, just as you would from a nutrition coach.
Other apps I’ve tested offer ongoing guidance, but none provide such a high level of coaching as MacroFactor.
2. Log Your First Meal
Logging your first meal is straightforward.
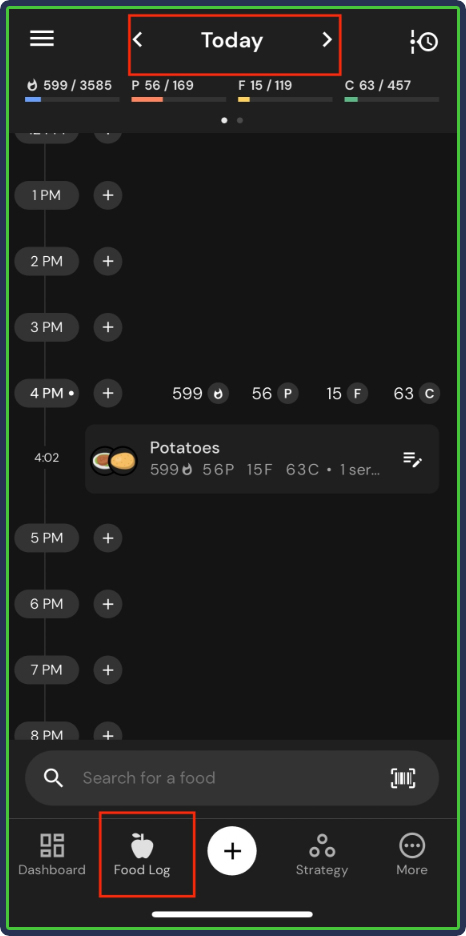
Click on ‘Food Log,’ make sure it’s set to Today on top (it should be by default), and click the Search for a food option:
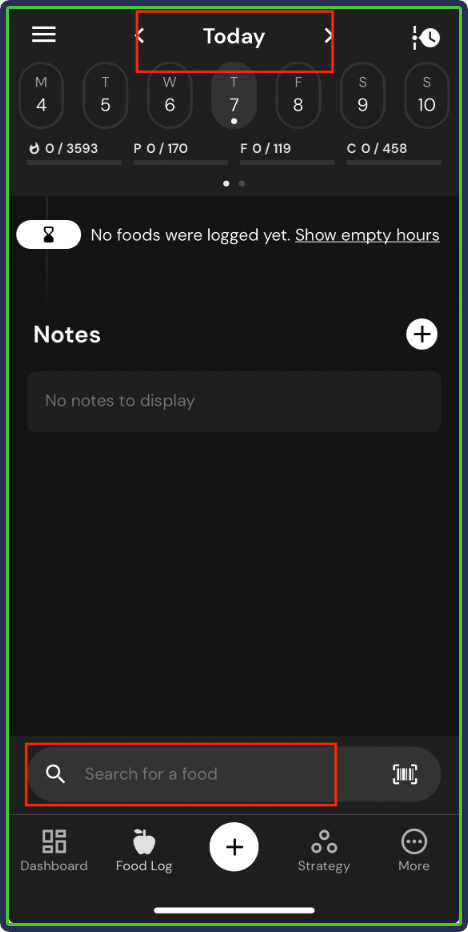
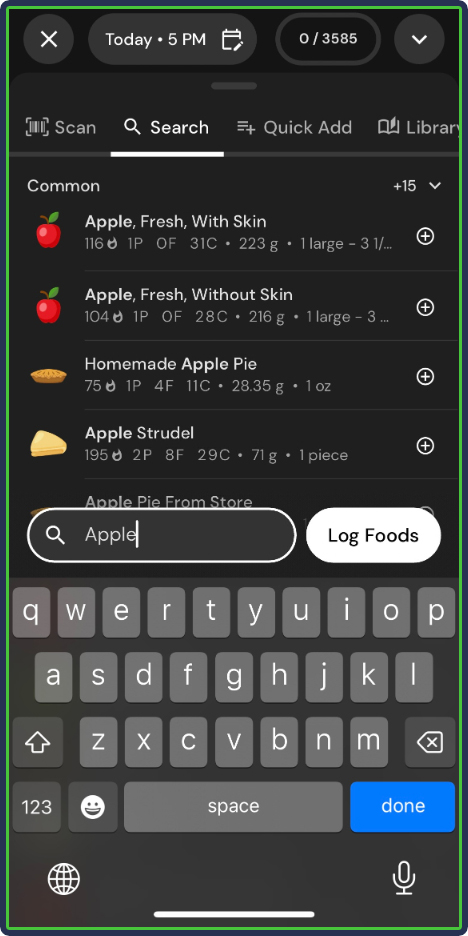
The app will present you with several options for finding food items:
- Barcode or label scanning (more on those in a moment)
- Searching through MacroFactor’s rich database
- Using the quick add feature (where you manually input the calories, macros, and the meal’s name)
- Inputting a recipe or foods from your library (which you can gradually add to over time)
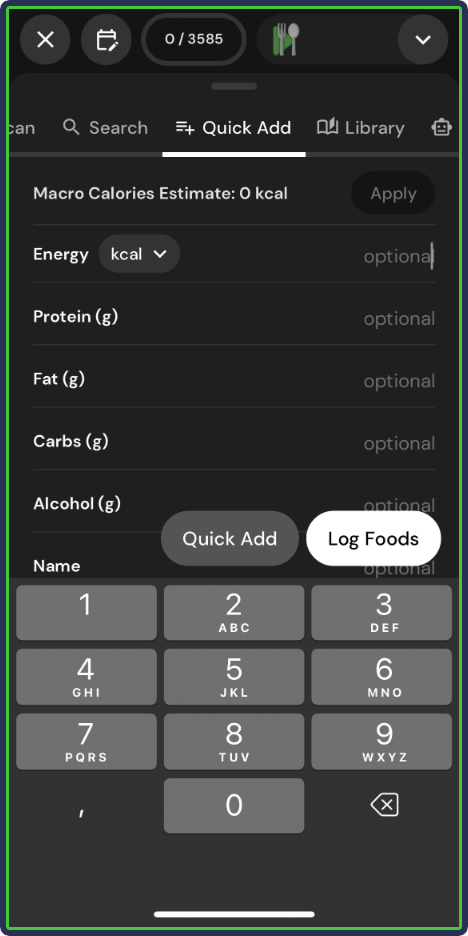
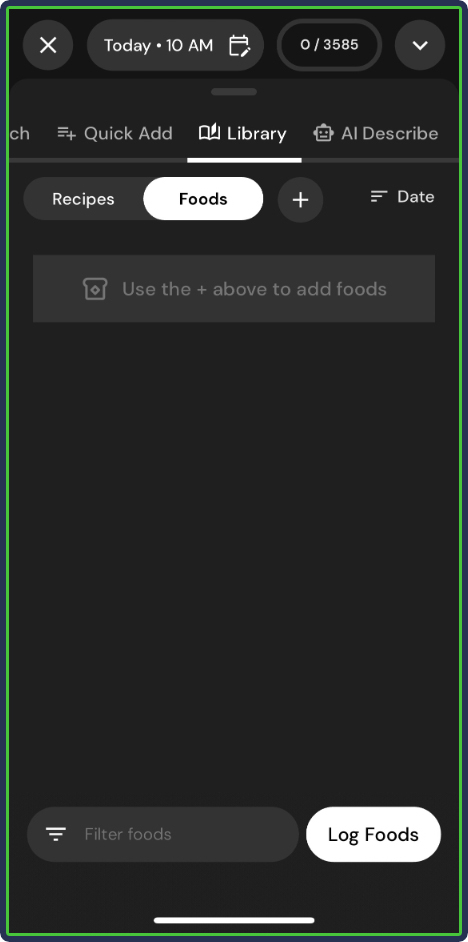
There’s also AI describe, which is technically a fancier feature, so we’ll discuss it below.
As a new user, I recommend using the ‘Search’ option and finding the foods in MacroFactor’s database.
There is an unbelievable variety of foods and beverages, each with an in-depth nutritional breakdown.

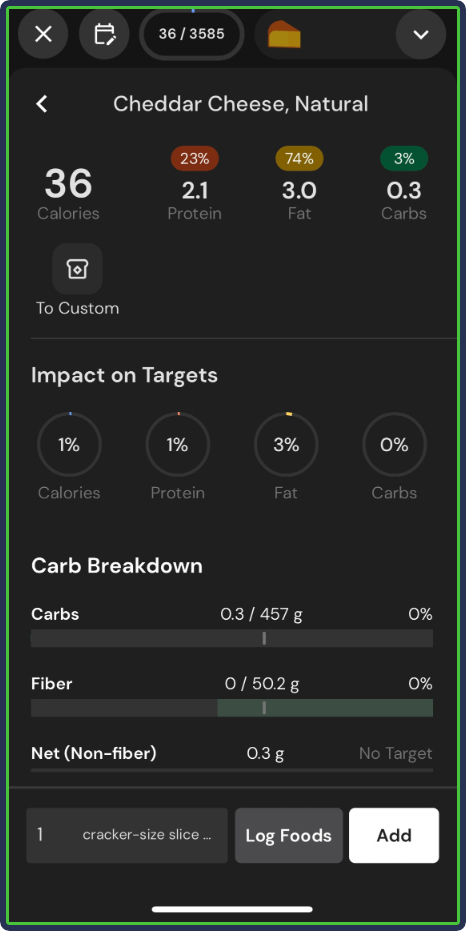
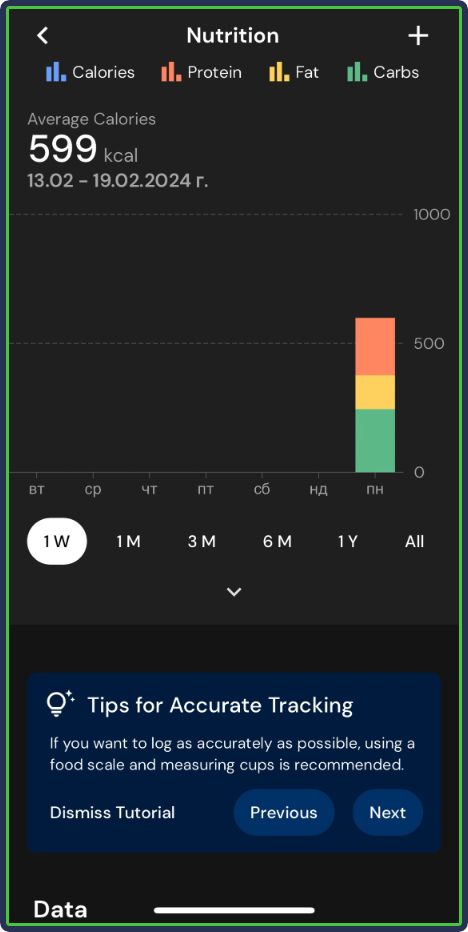
The app will automatically calculate the calories and macronutrients for each meal, which will immediately show up in the dashboard, where you can track the number of calories and grams of protein, carbs, and fats you’ve had for the day:
The fastest way to record meals with multiple foods is to use the plate feature. To do so, tap the large white + icon at the bottom and tap Quick Add. Using the barcode scanner, search bar, your personal library of foods and recipes, and AI describe, add foods.
Click on Add for all the food items:
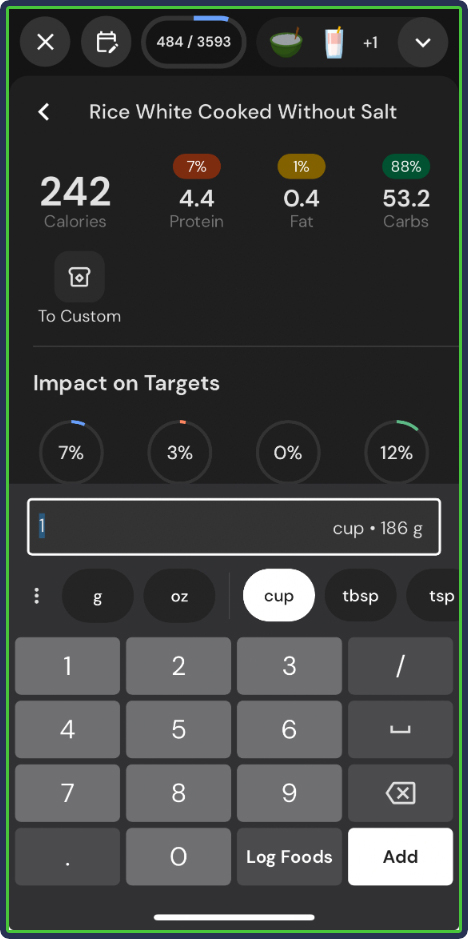
All the food items will appear on the top right:
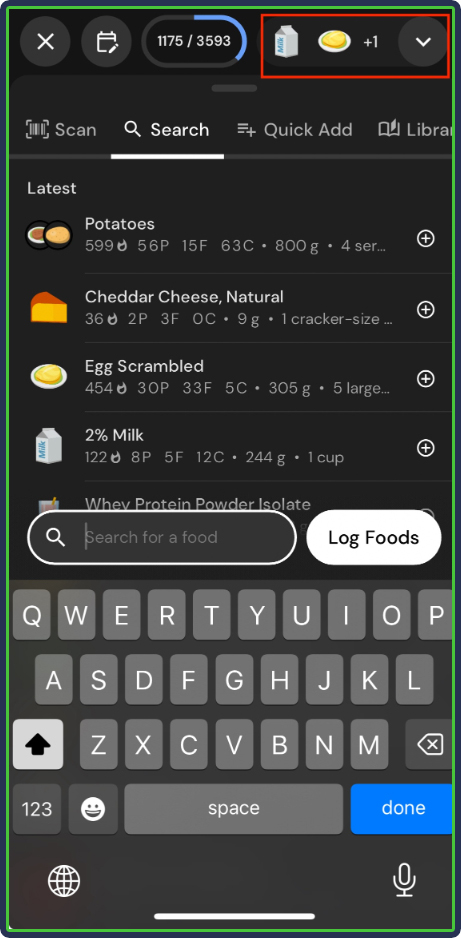
Click on that section to easily review your meal and its nutritional breakdown:
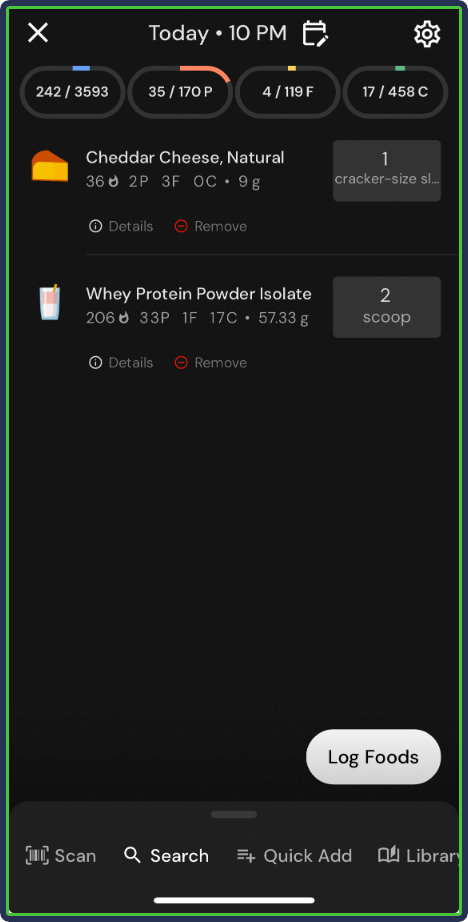
Once you’re done, tap Log Foods to record everything at once and count it as a single meal or snack.
3. Use the Barcode or Label Scanner
Barcode and label scanners are not new, and you might have used them on other nutritional apps (which MyFitnessPal pioneered back in the day).
Go to ‘Food Log,’ click on the small + icon next to the time correct time of day (when you’ll have a meal), and select ‘Scan’ on top:
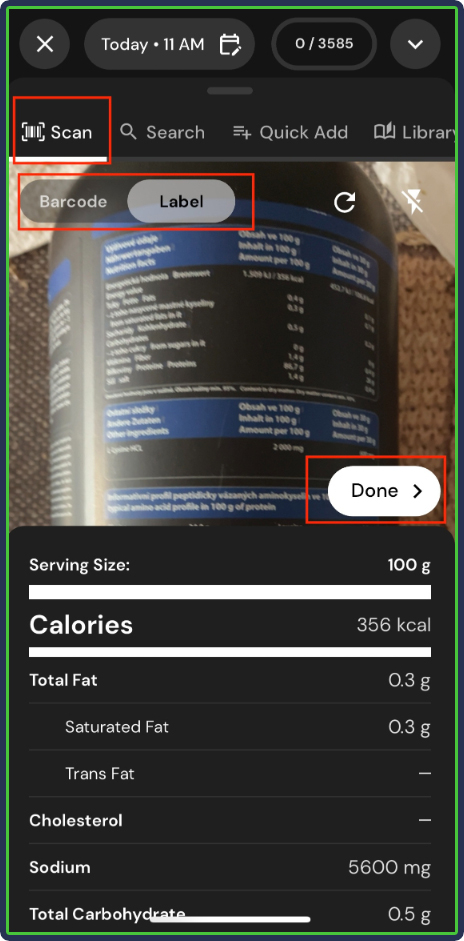
Point your camera toward the barcode or label (I’ve found that I don’t even have to position these in the outlined square to be scanned), and that’s it.
Both work well and make it easier to log packaged foods.
4. Add One Favorite Recipe
One thing I love about MacroFactor is that it allows me to create my own library of foods and recipes.
So, the longer I’ve used the app, the easier it is to log my meals and stay on top of my calories and macros.
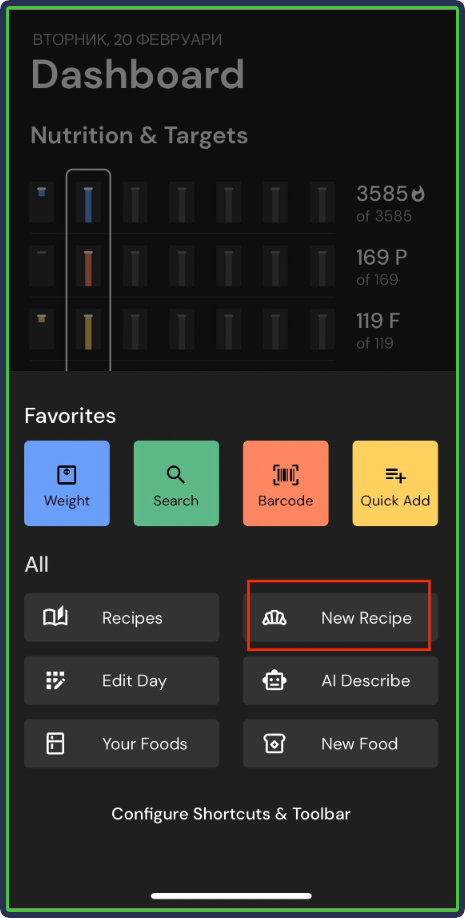
To add a recipe, navigate to the large + icon at the bottom and select ‘New Recipe.’
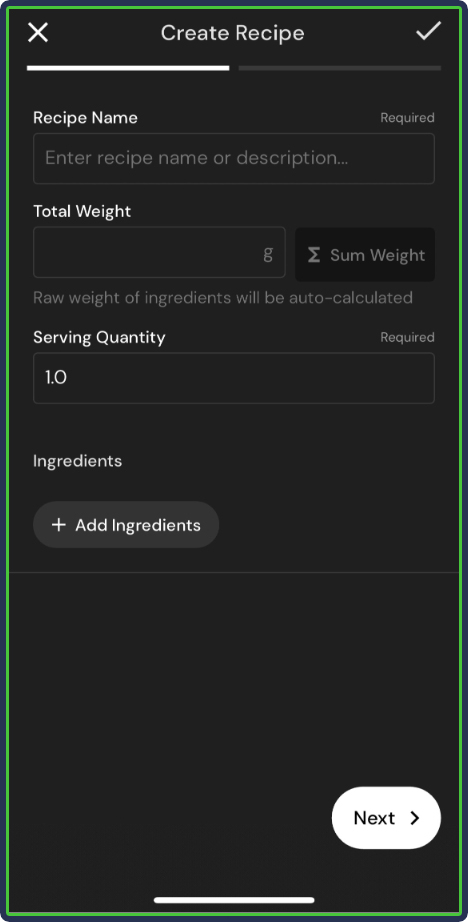
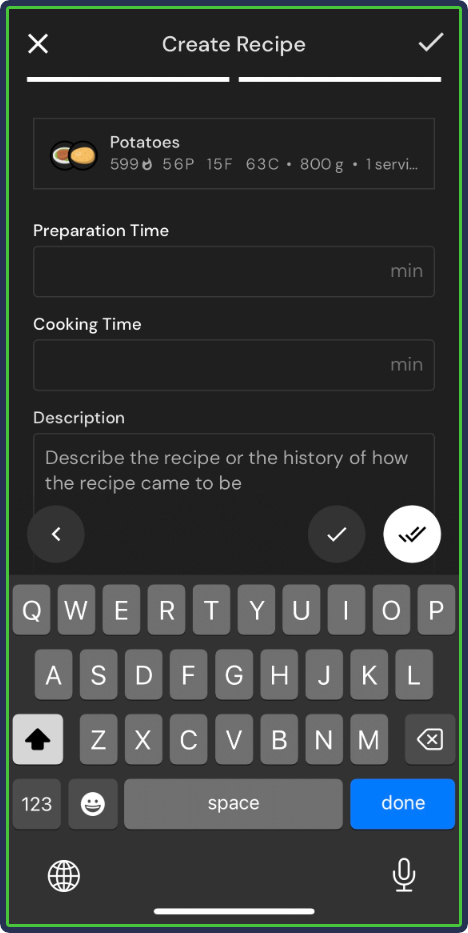
Include all the relevant details, such as the name, total weight, serving, prep and cooking time, and a description (optional).
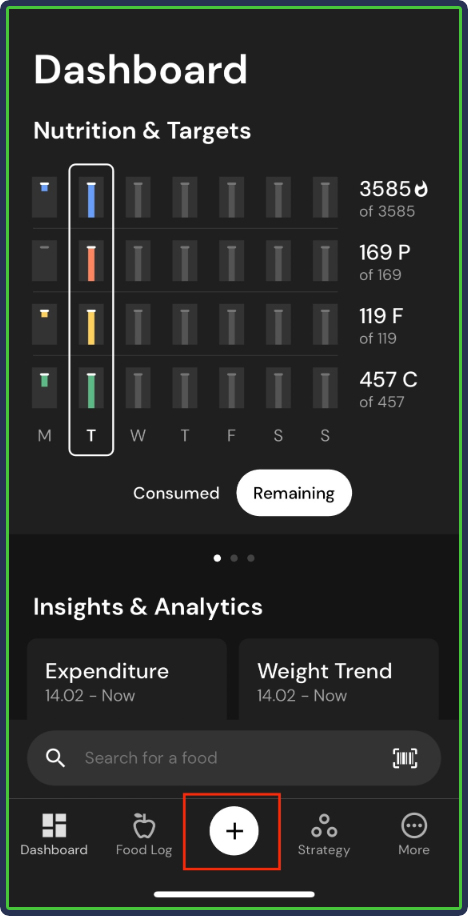
You can then find the saved recipe by clicking the same + icon and clicking on ‘Recipes.’
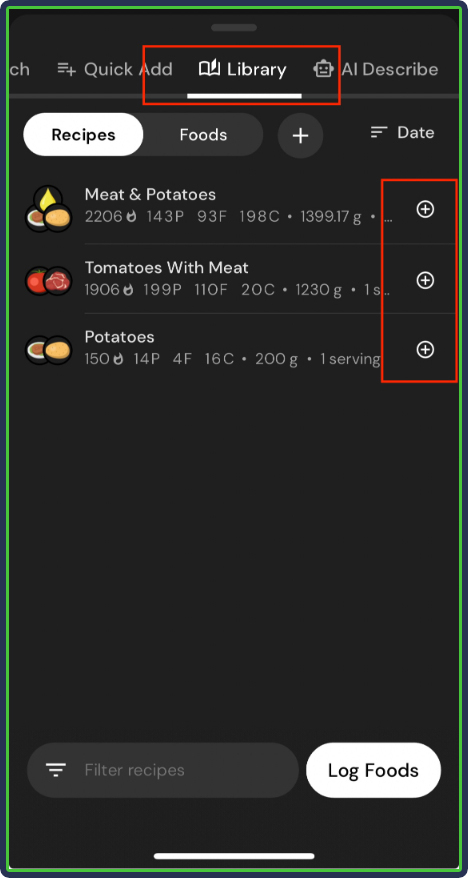
To log a saved recipe, go through your usual food logging workflow by clicking on Food Log. Search for a food and swipe to the Library section where you can see your saved recipes and click the small + icon to log any one of them.
5. Log Your Body Weight
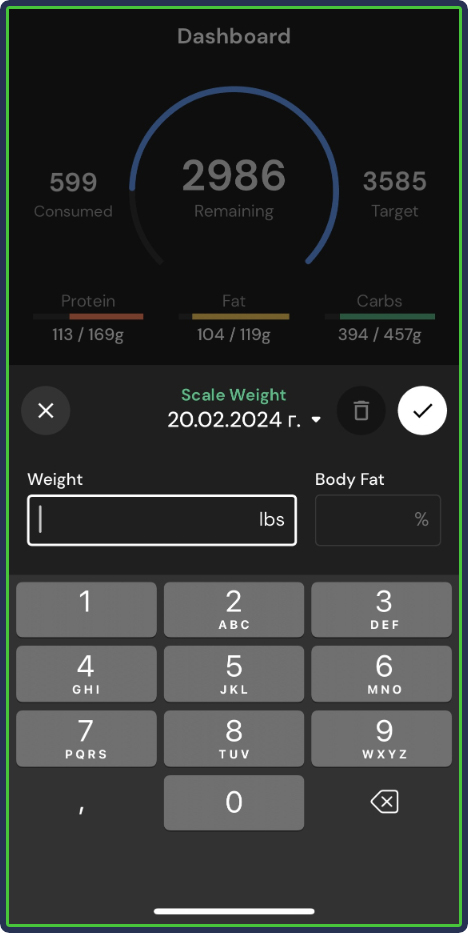
Since MacroFactor is a nutrition-logging app with coaching capabilities, you must also log your body weight at least once per week (though it’s recommended that you log your weight at least three times per week) for it to track weight trends and more accurately update your nutritional targets each week.
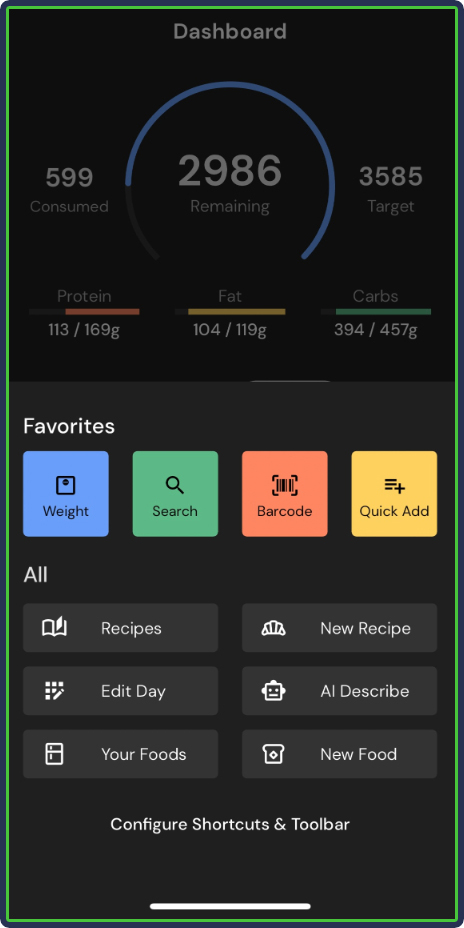
Log your daily weight by clicking the large + icon at the bottom and the ‘Weight’ icon.

You can also input your estimated body fat percentage if your scale tracks that.
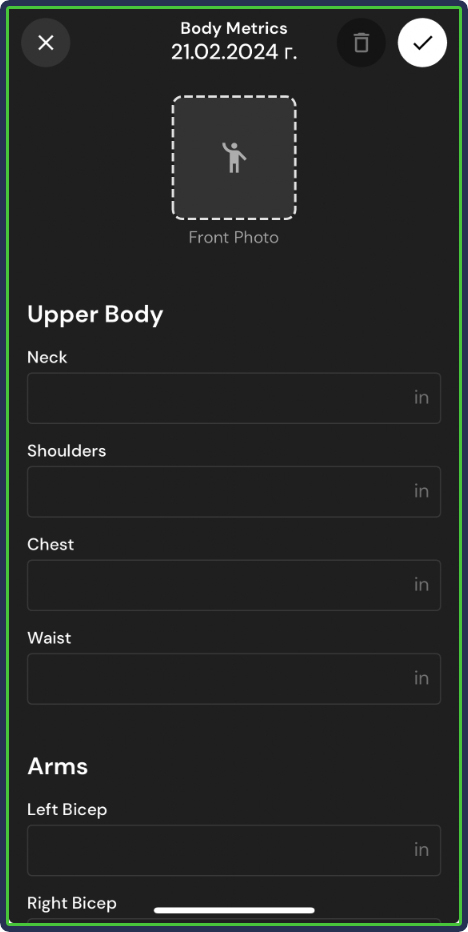
6. Upload Progress Photos & Body Measurements
While not mandatory, progress photos and body measurements can provide insight into how your body composition changes over time.
You must go into the settings to enable the progress photos and body measurements you want to track (you don’t need to track all the available ones).
To navigate, click ‘More’ on the bottom right, scroll down to the ‘Features & Settings’ section, and navigate to ‘Body Metrics.’
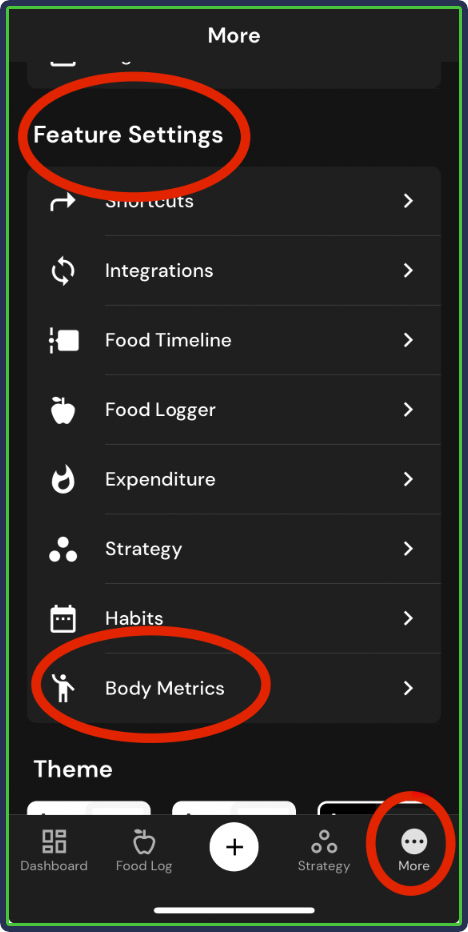
As a new user, you can also scroll to the bottom of the dashboard and tap the body metric widget, which will take you to the menu where you can configure your settings for the first time.
Select which progress photos you want to upload and which body measurements you want to track and save the changes.
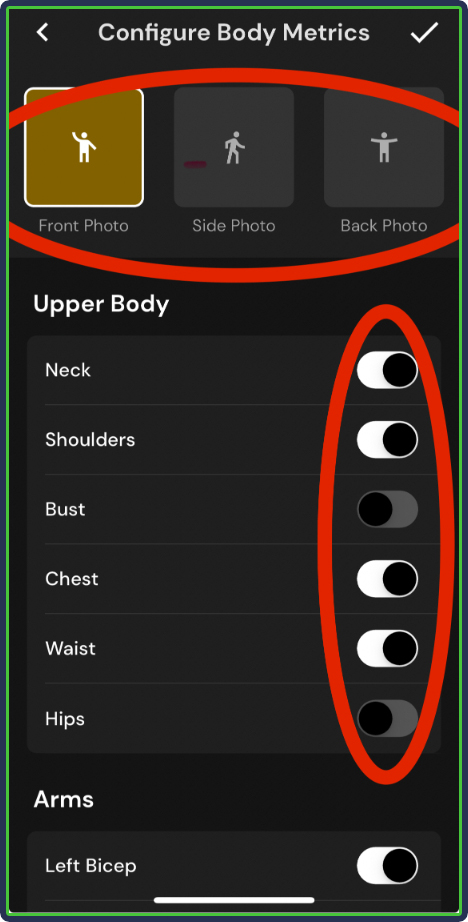
Once done, you can easily upload photos and body measurements by clicking the large + icon on the top right, upload your progress photo or photos, input the body measurements, and save.
7. “Completing Days” Happens Automatically
Log your meals, and the app will automatically calculate everything and add it to your daily total.
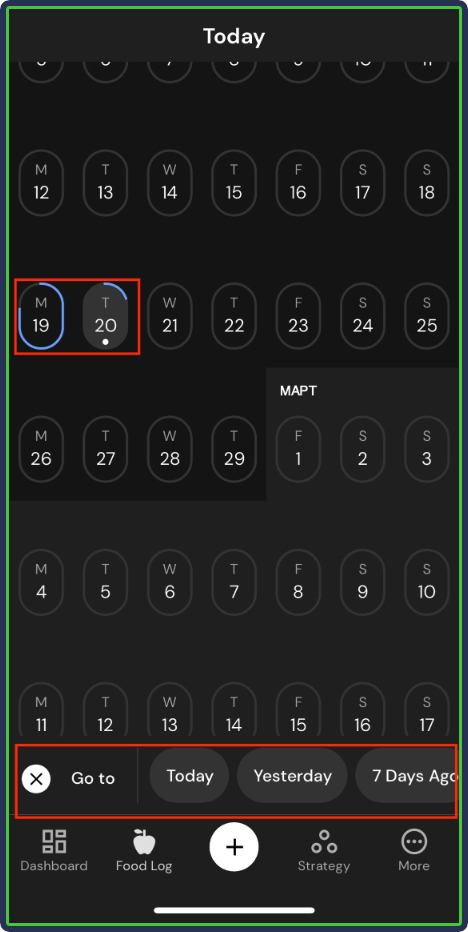
You don’t have to ‘complete’ days, like other apps––MacroFactor will automatically consider days complete once the date changes.
That said, you can return to older dates to add meals or modify existing ones in case you’ve forgotten to log something. I like this because it removes the stress I’ve felt with other apps in the past, where I would have to finish logging foods and complete the day, even if I’m out with friends or otherwise busy.
To do that, click ‘Food Log,’ tap on ‘Today’ (on top), and select a date on the calendar you want to modify.
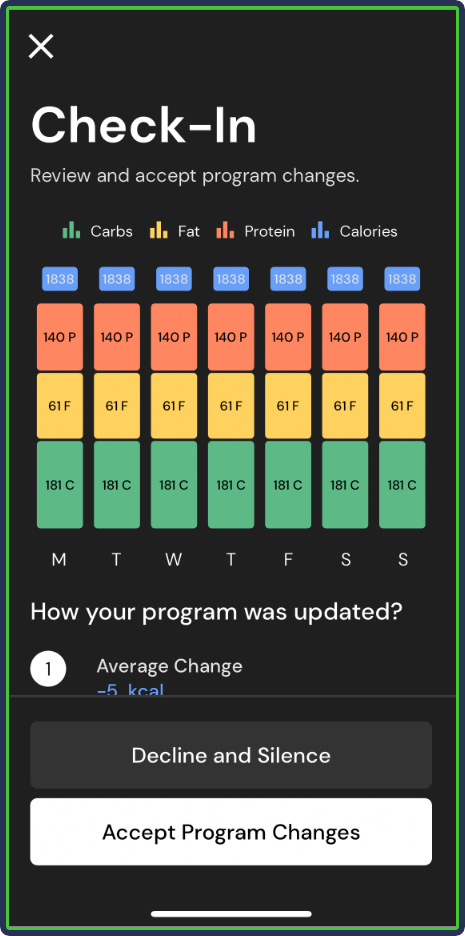
Once you do a week of logging, you’ll get to check-in (found under ‘Strategy’) at the bottom:
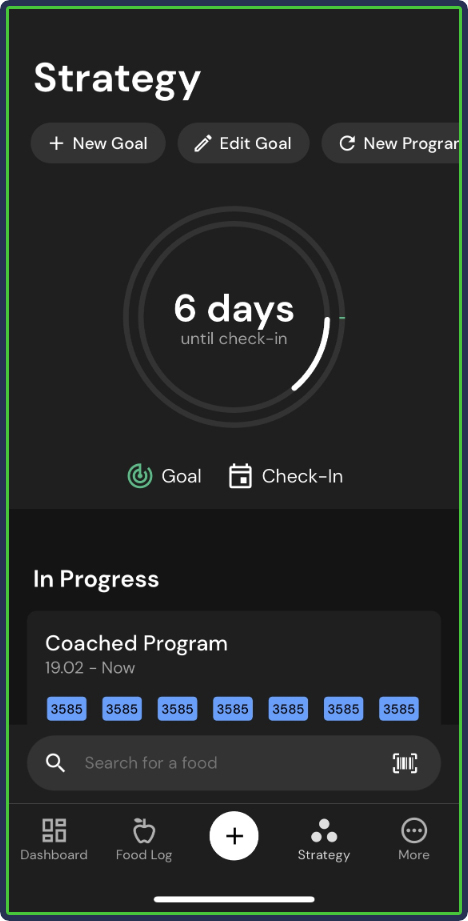
MacroFactor will provide nutritional recommendations based on your nutrition and weight trends for the upcoming week.
You can accept or decline the changes and keep going. If you decline a check-in, you can manually check in whenever you want to get back on a regular check-in cadence.
Aside from that, you can gradually add recipes and custom foods to your library, upload progress photos, and include body measurements to track your body composition.
Key Features NOT To Miss on MacroFactor
Now that I’ve gone over the basics of MacroFactor, let’s review some of the app’s lesser-known features.
I spoke with Greg Nuckols, one of the app’s co-founders, to provide a comprehensive overview.
He provided some excellent input, so let’s break it down.
1. Weight Trends
Go to the dashboard and scroll to the ‘Insights & Analytics’ section, where you will find your Weight Trend:
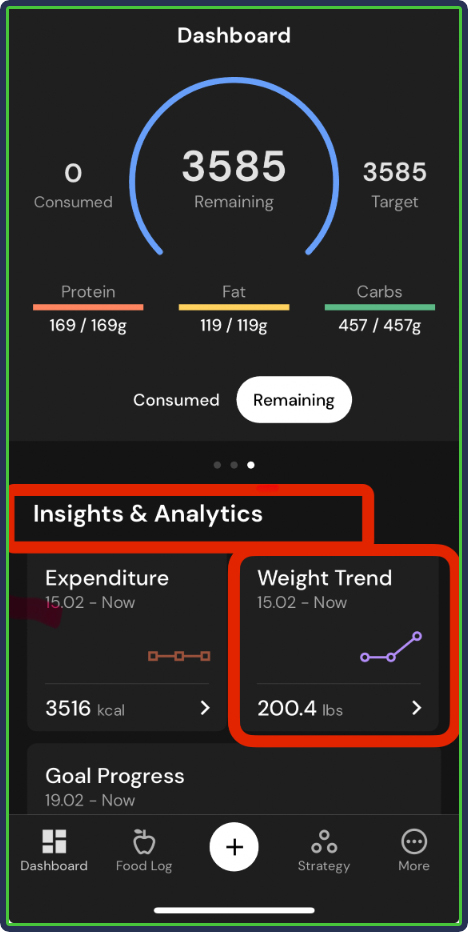
There, you will see all kinds of information regarding your body weight and how it’s likely to change based on your current trajectory.
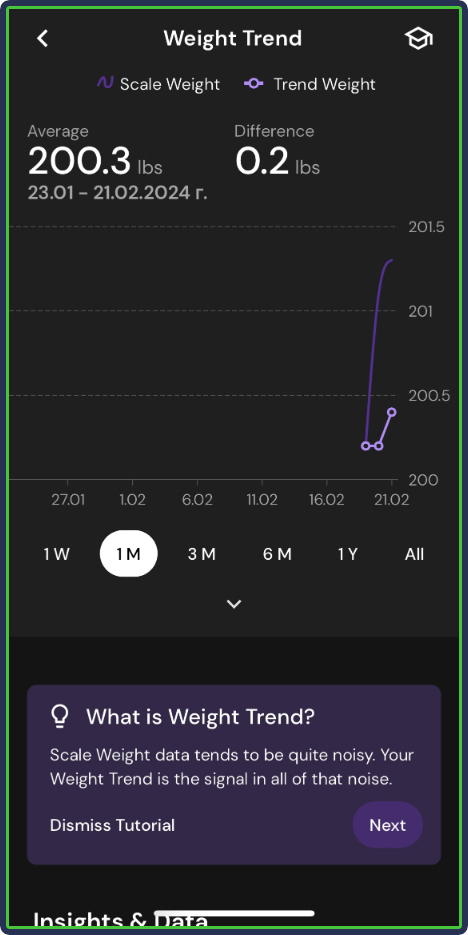
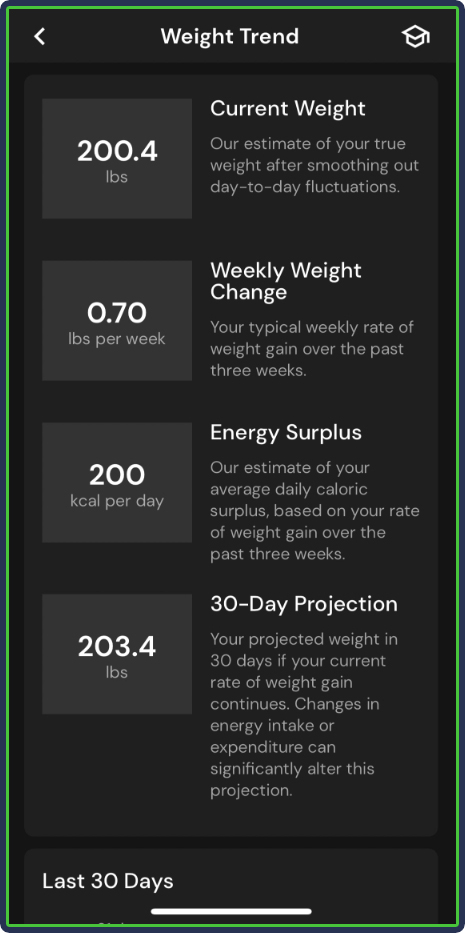
This section focuses on your body weight without mixing that data with other things, such as your current or previous energy expenditure.
As Greg puts it:
“Expenditure gets most of the attention, but just being able to remove most of the noise from your weight data is really helpful for a lot of people.”
2. Prepare Recipes
I briefly mentioned recipes above, but this feature bears repeating, especially for cooks who like to experiment in the kitchen.
MacroFactor allows you to store detailed recipes and include information like:
- Ingredient list
- Prep time
- Cooking time
- A recipe description
- And step-by-step instructions
MacroFactor automatically calculates the weight per serving based on individual ingredients and provides the best nutritional breakdown with calories, macronutrients, and micronutrients.
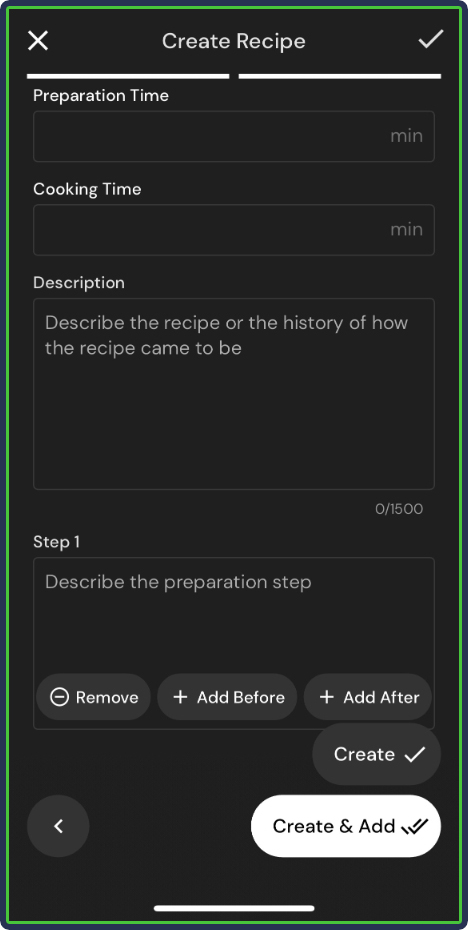
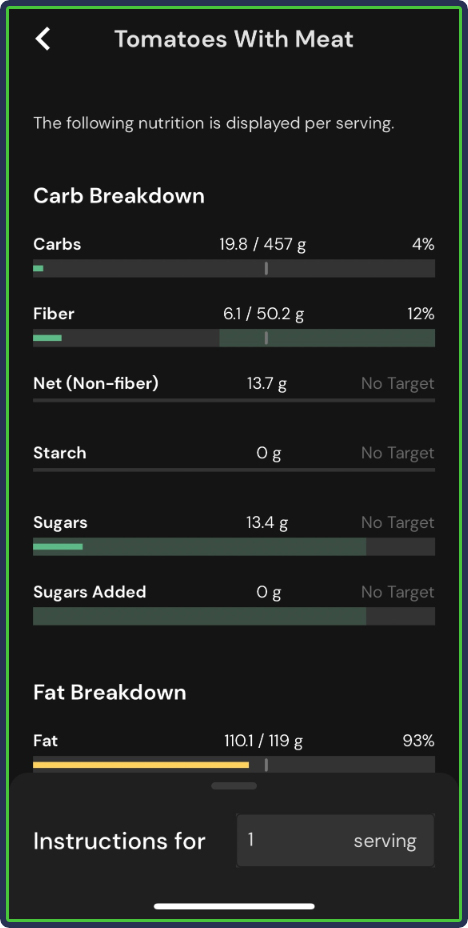
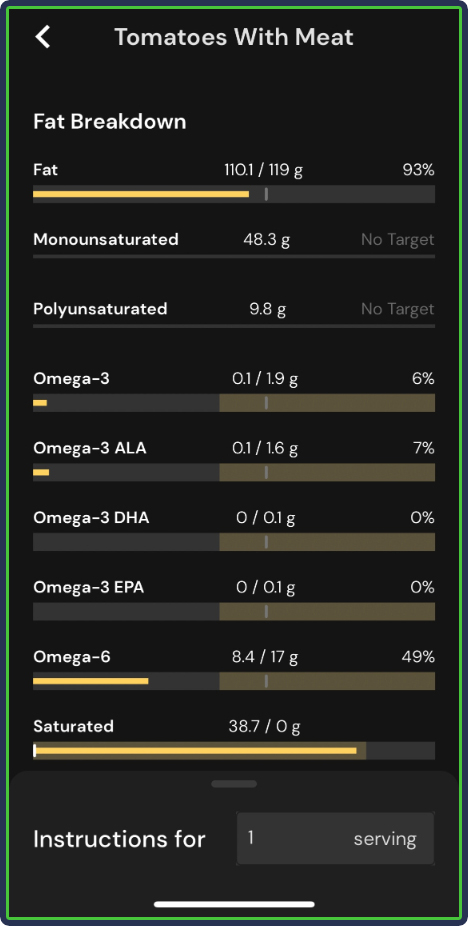
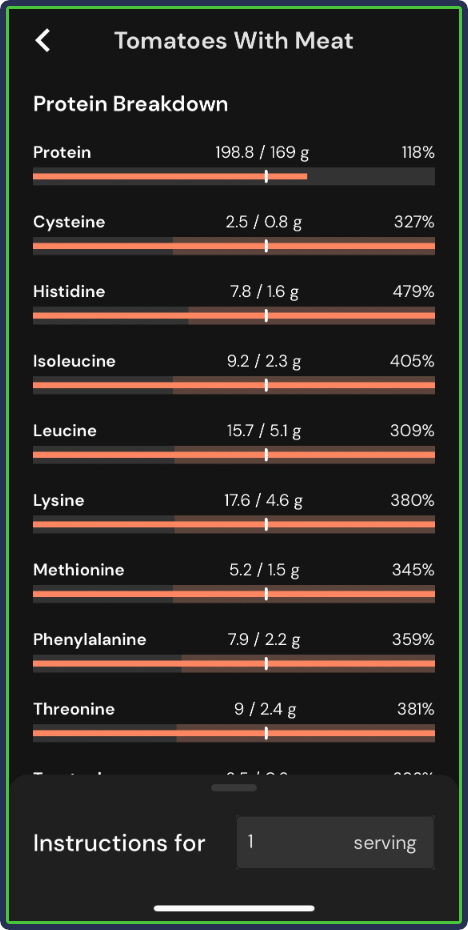
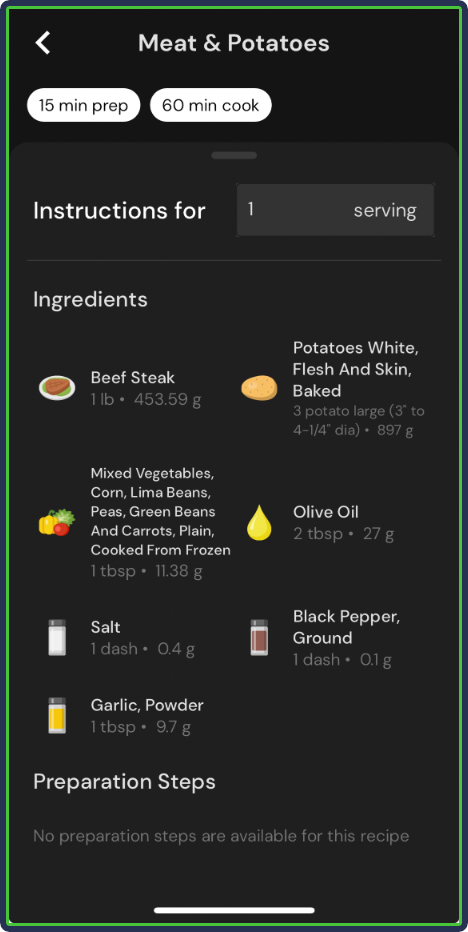
Once you’ve saved the recipe in your library (found by clicking the large white + icon and tapping ‘Recipes’), you can select a specific recipe and click ‘Prepare.’
The app will instantly pull up the cooking instructions you’ve saved while recording the recipe.
As Greg puts it:
“The “prepare recipe view” is pretty useful so you can get a clear view of ingredients and steps while you’re cooking.”
3. Recipe Within a Recipe
This feature allows you to use recipes you’ve already saved as ingredients for new ones.
For example, if you have some leftover food from a recipe, you can use that to cook something new, and MacroFactor will handle all the nutritional calculations.
To use this feature, click on the white + icon at the bottom and navigate to ‘New Recipe.’
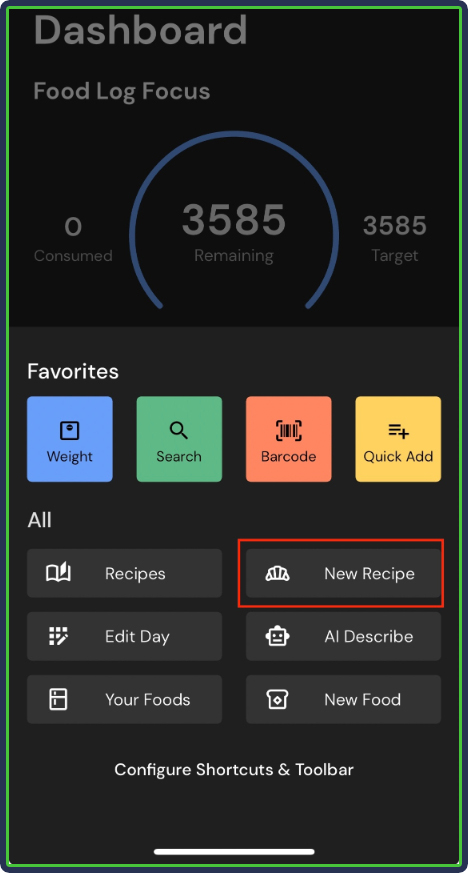
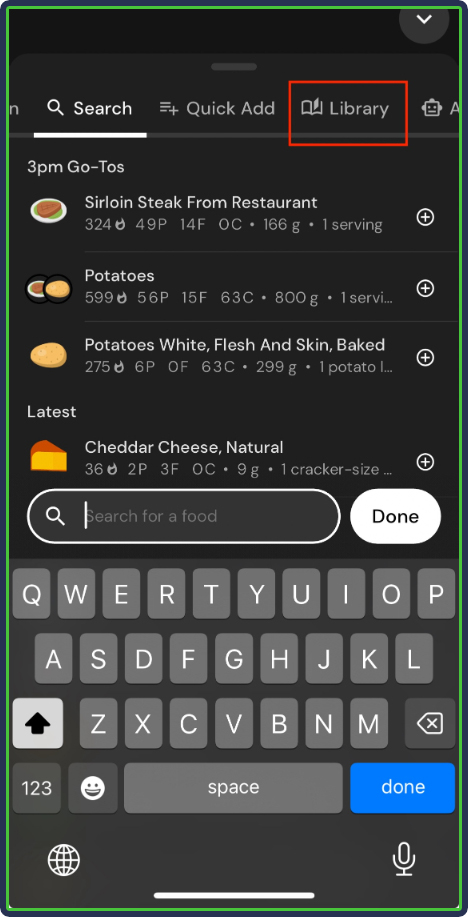
As you’re inputting the details, click on ‘+ Add Ingredients’ and go to ‘Library’ at the top:
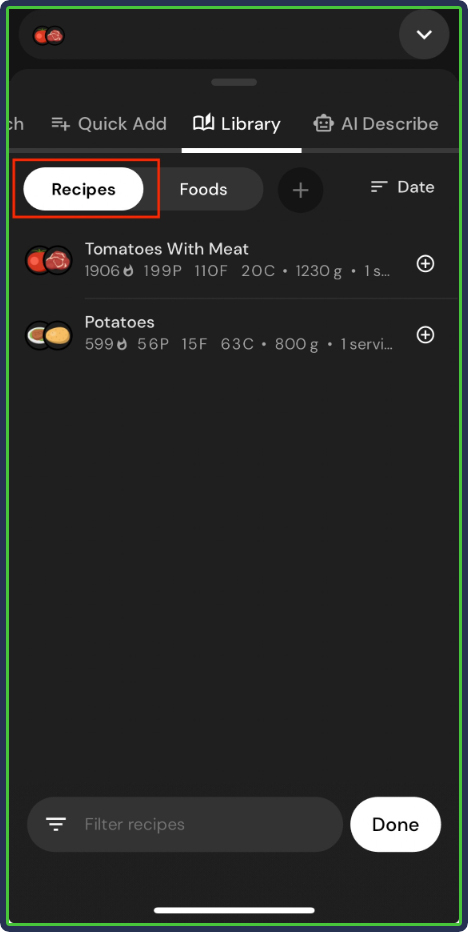
Then, click on ‘Recipes’ and tap the small + sign on the right to add one of your saved recipes as an ingredient for your new one:
As Greg puts it:
“The fact that you’re able to add one recipe as an ingredient in another recipe is pretty clutch.”
4. Custom Micronutrient Goals
Most apps have allowed users to set custom macronutrient targets for a long time.
But custom targets for vitamins and minerals? That’s not something you see in every app.
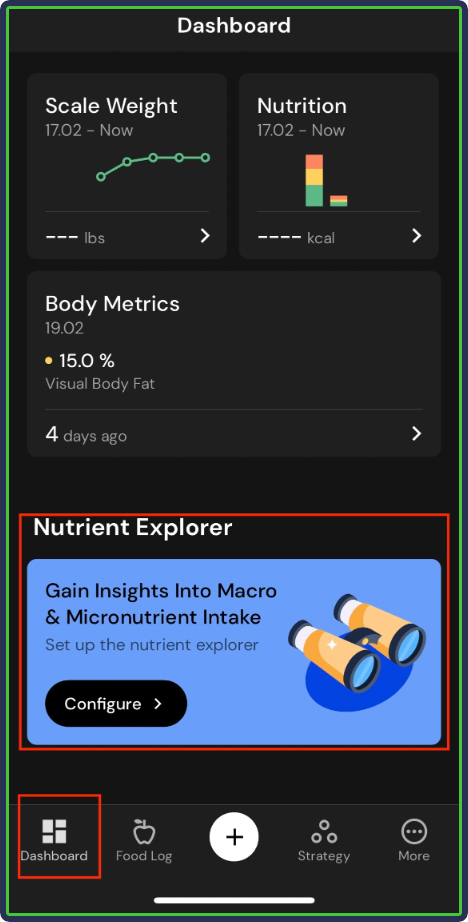
If you have unique needs for certain micronutrients (such as sodium, iodine, or vitamin D), you can adjust the goals by navigating to the Nutrient Explorer (scroll down to the bottom of the dashboard):
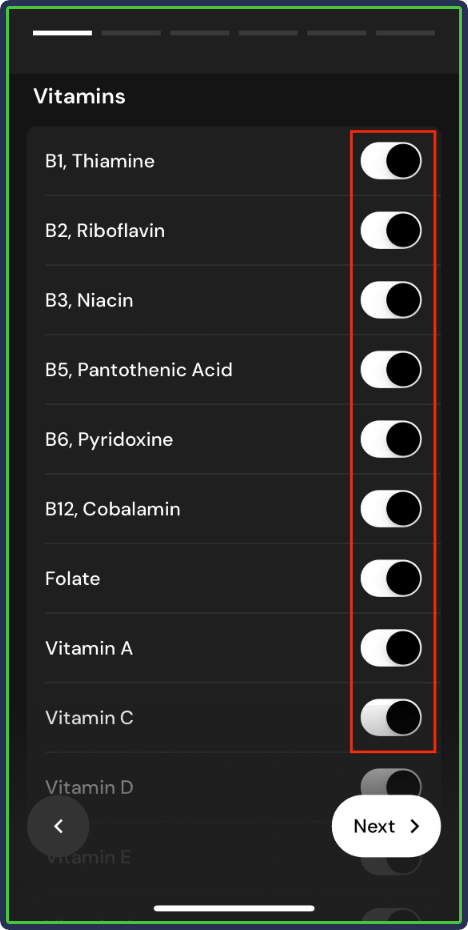
Then, select which micronutrients you’d like to track:
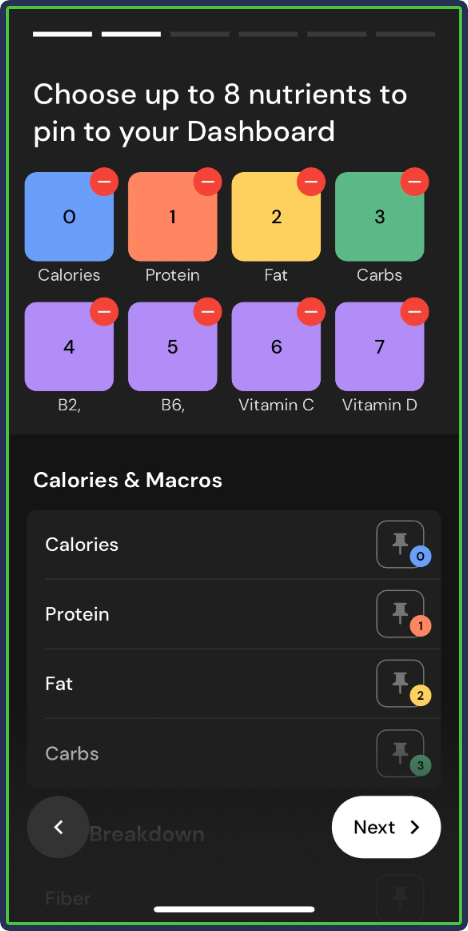
From there, you can pin up to eight nutrients or metrics to your dashboard:
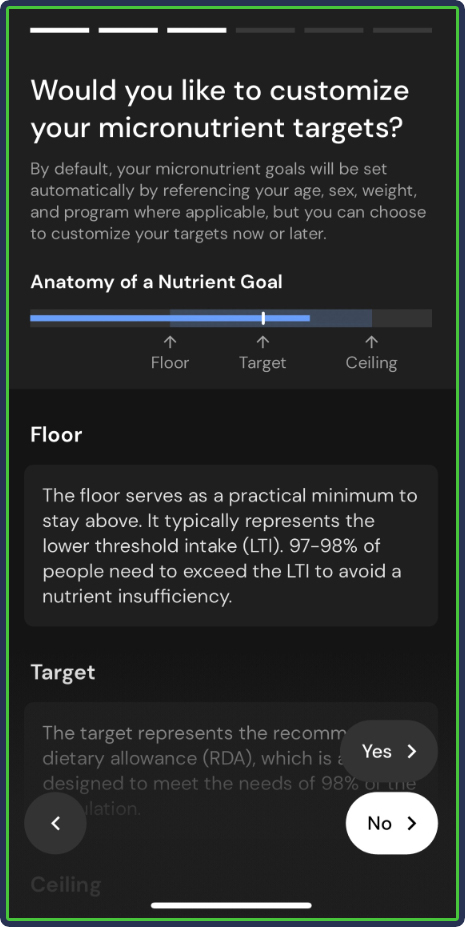
You can also customize your micronutrient targets or go with the recommendations provided by the app:
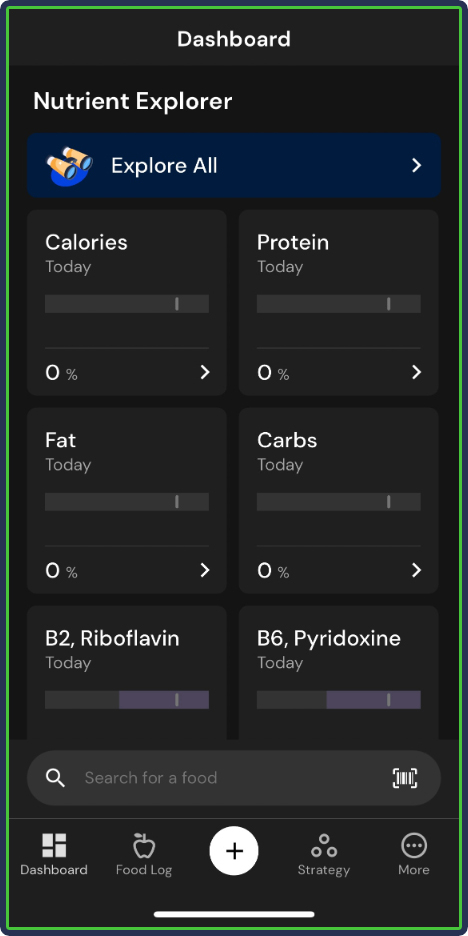
Your pinned nutrients will now show up in the dashboard:
5. Dark Mode
You might not care about this, but it’s nice to have.
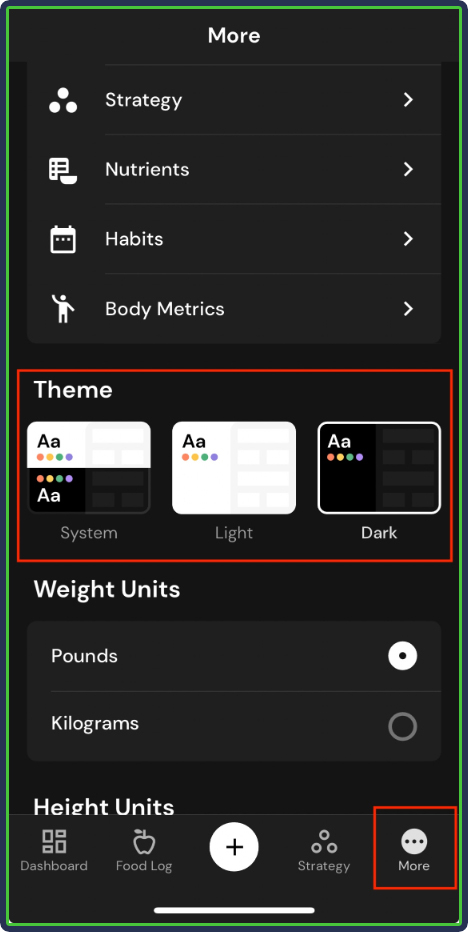
Activate it by clicking on ‘More’ (bottom right), navigating to ‘Theme’ and choosing your preference:
6. Full Unit Support
MacroFactor is incredibly inclusive because it supports all units for most products. This makes it easier to log meals and add ingredients to recipes.
For example, if you can log a particular food in ounces, you can also log it in grams.
I love this freedom because I prefer to use grams and milliliters to log foods and beverages, and MacroFactor eliminates the hassle of converting units on Google to log my meals.
7. AI Describe
Finally, there is the AI describe, which I mentioned previously.
This feature lets you quickly describe what you’re eating through text or speech, and the app does the rest.
For example, I used the speech-to-text feature to input some foods I had eaten.
The app easily understood what I told it and calculated the nutritional information for the meal:
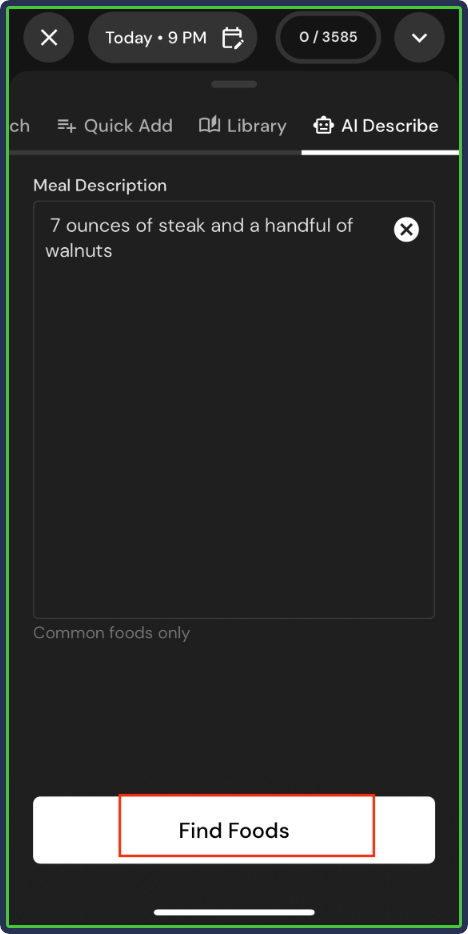
This is a convenient way to log meals when on the go because you can simply dictate what you eat, click ‘Find Foods,’ and go about your day. It’s like a voice note but for your meal logging.
Personalizing MacroFactor
Finally, I asked Greg if he had any extra tips for personalizing MacroFactor above and beyond what I’ve already mentioned.
Here are his suggestions:
1. Set Up Your Plate Banner Builder
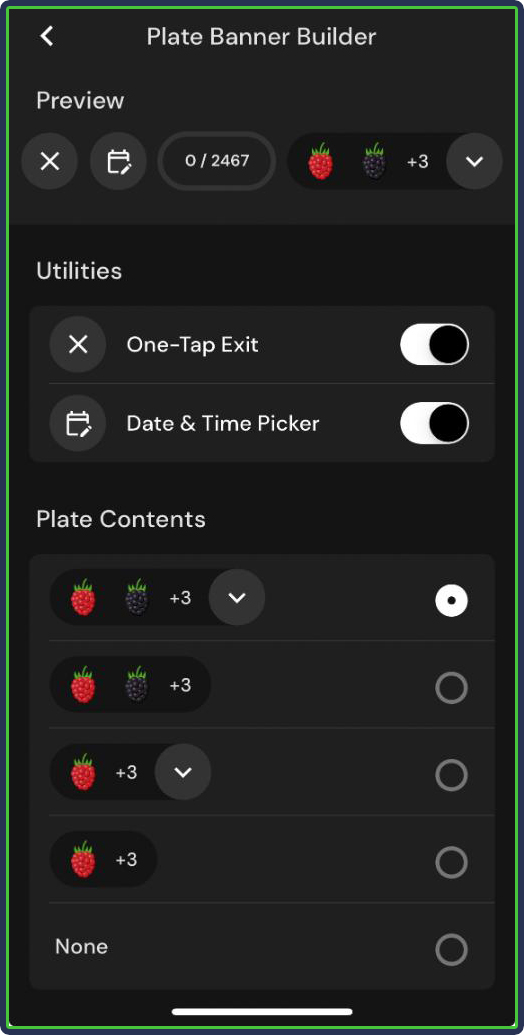
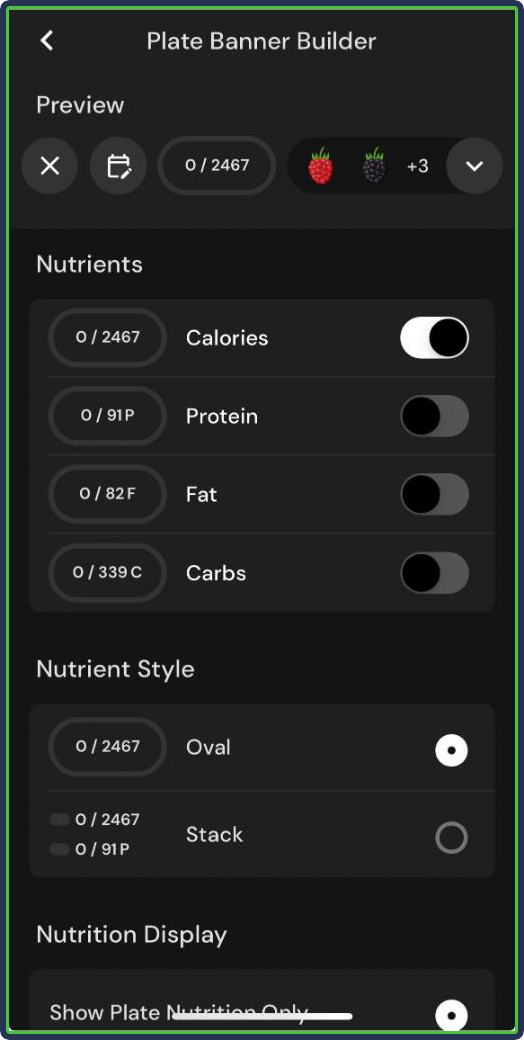
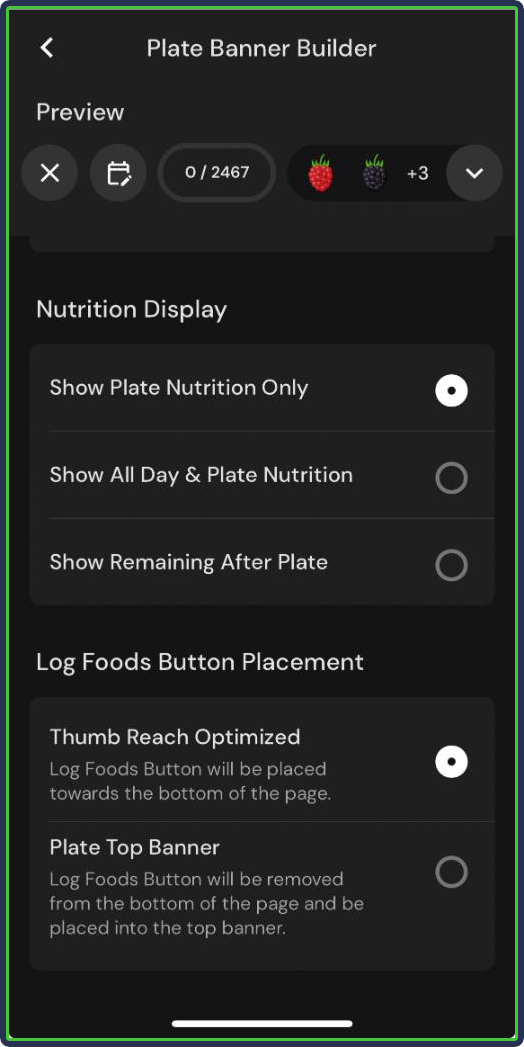
The plate banner builder is a customization page that allows you to adjust what things you see when logging your foods. You can navigate there by clicking More > Food Logger > Go to Plate Banner Builder.
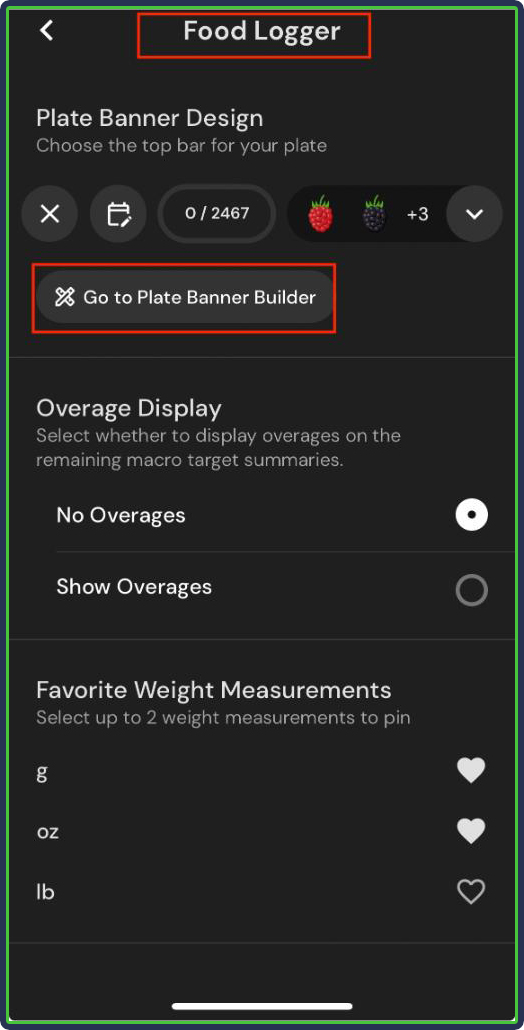
From there, configure how you want to see the meal logging section:
2. Configure Your Shortcuts and Toolbar
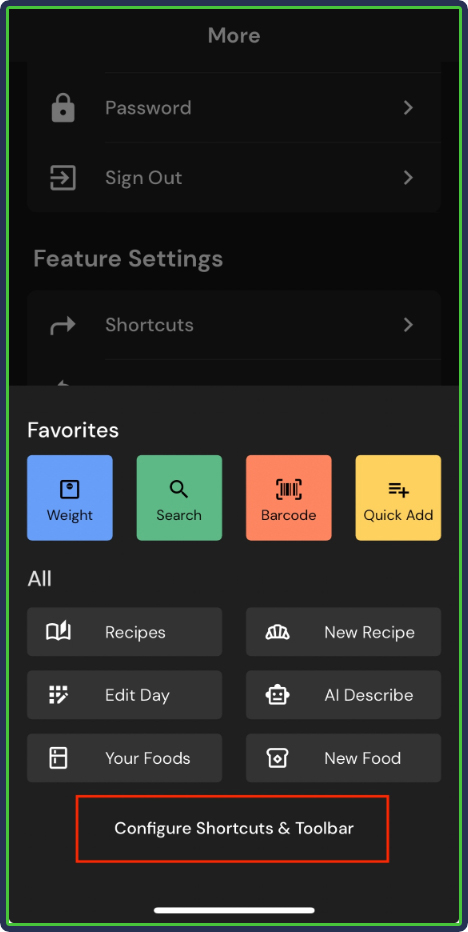
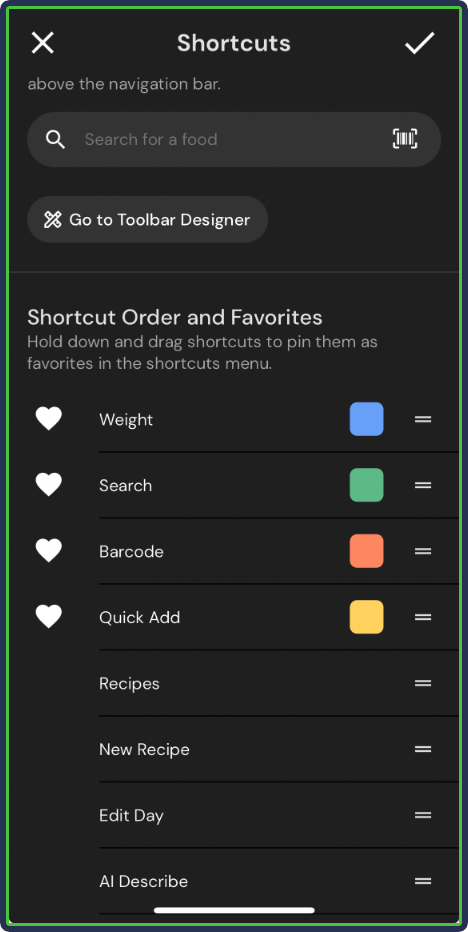
MacroFactor allows you to configure your shortcuts and toolbar to log your foods just a bit faster.
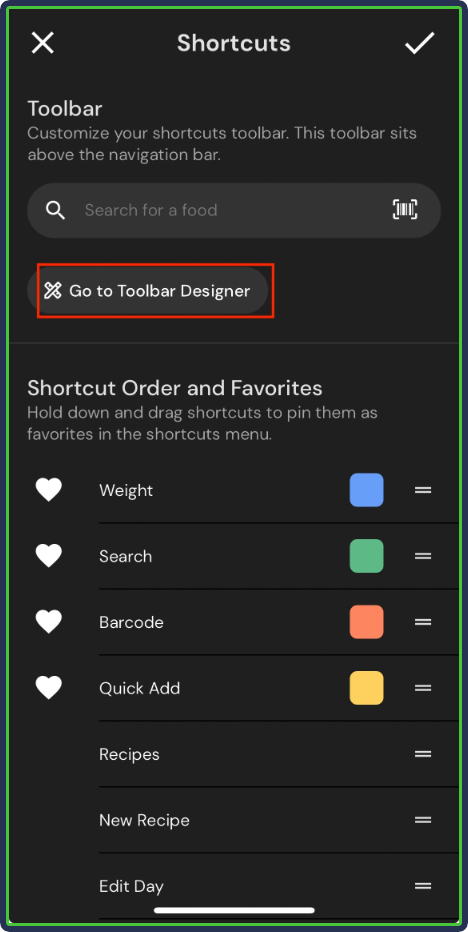
Click the large + icon on the bottom and tap Configure Shortcuts & Toolbar:
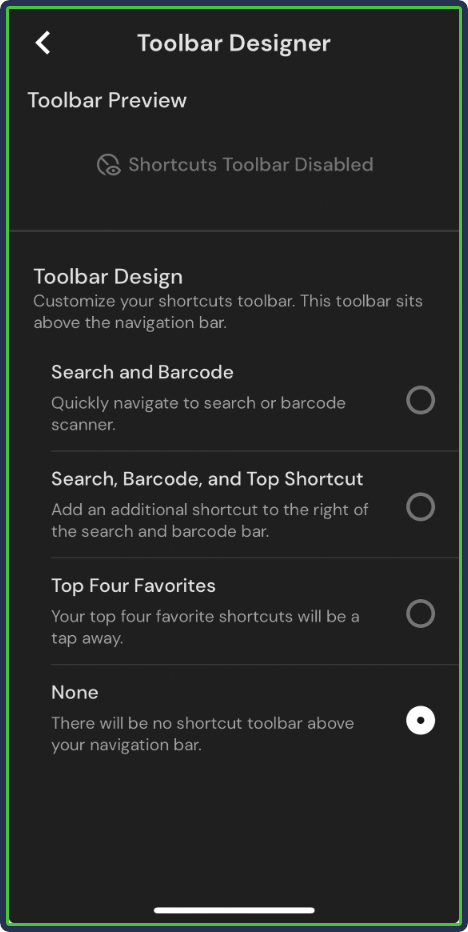
Go to Toolbar Designer:
Here, you can pick from several options:
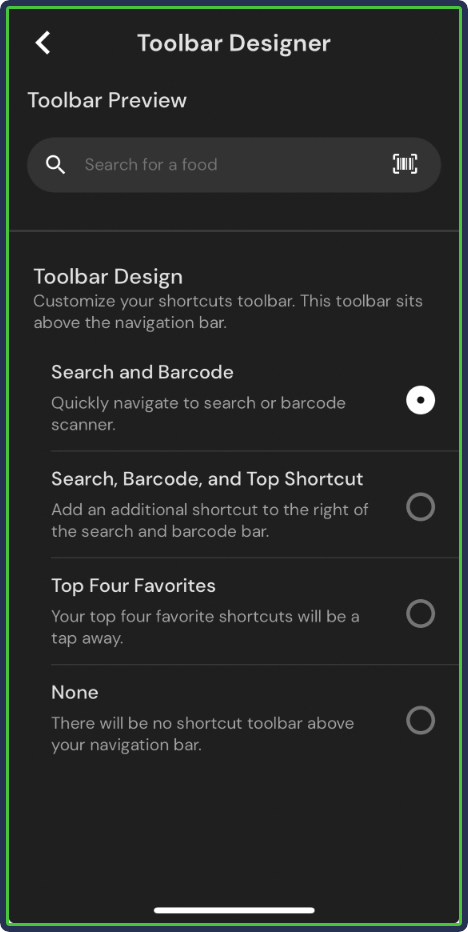
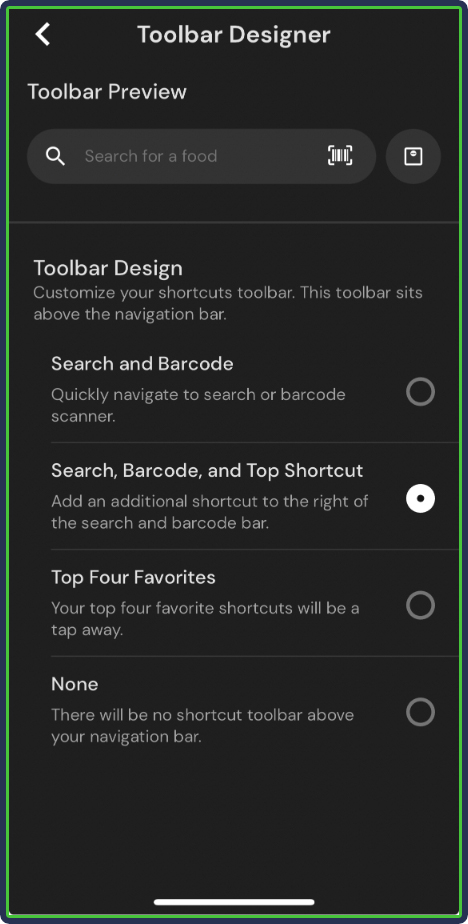
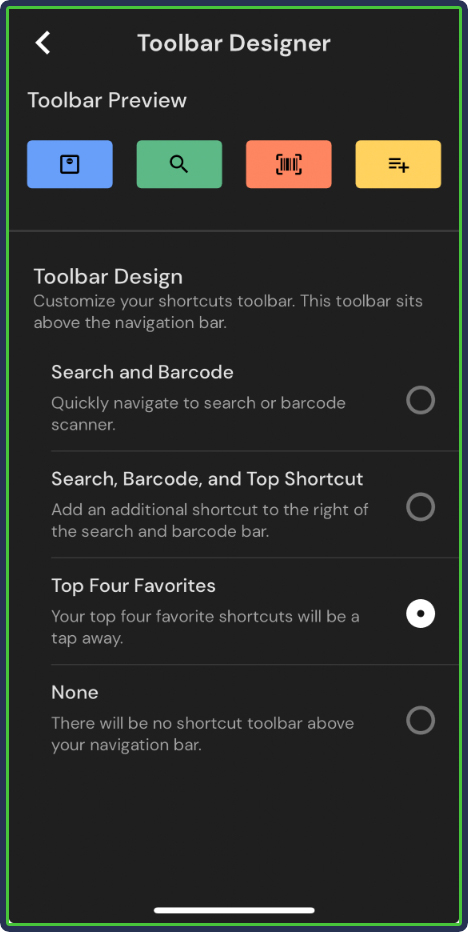
You can also change or re-arrange your shortcuts on this page:
3. Configure Your Food Timeline
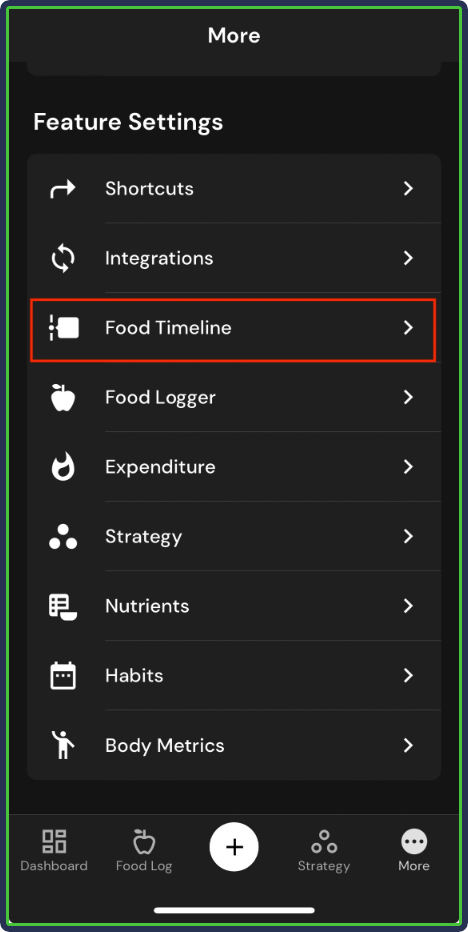
The Food Timeline section of the app allows you to customize how things appear when you log meals. To access these options, tap on More > Food Timeline.
There, you will see all sorts of options:
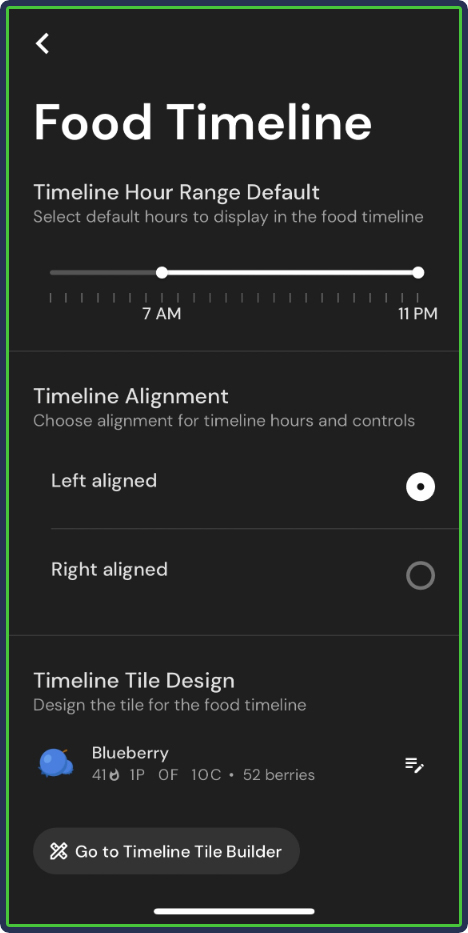
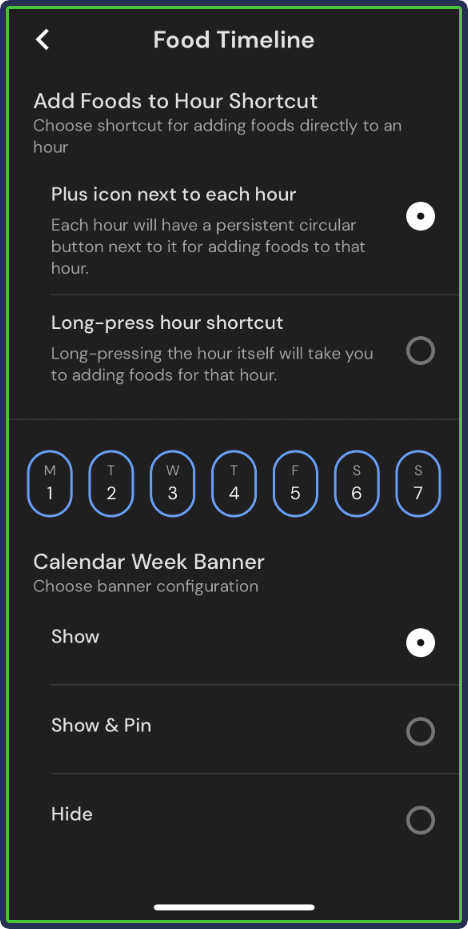
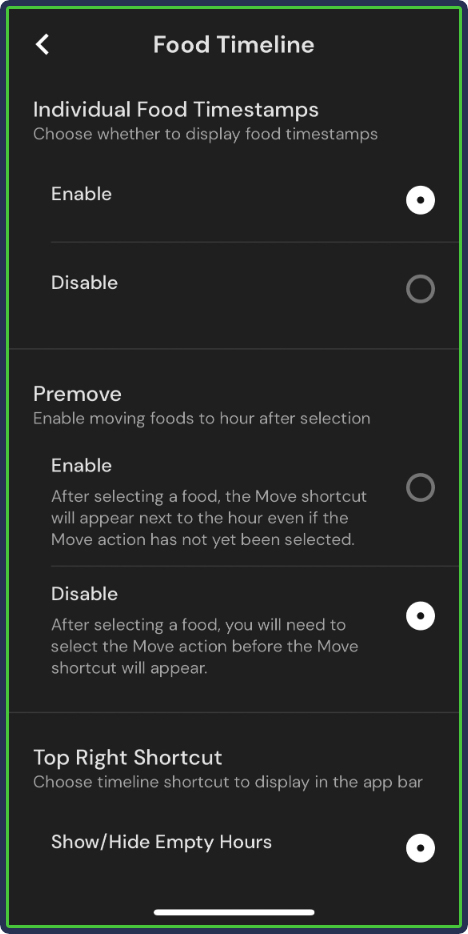
You can also click on the Go to Timeline Tile Builder and access even more customization options for what information to display and how to display it:
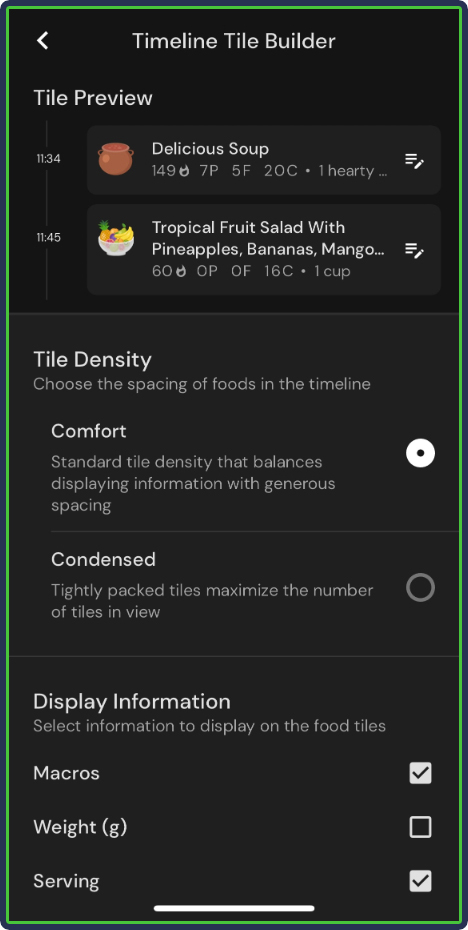
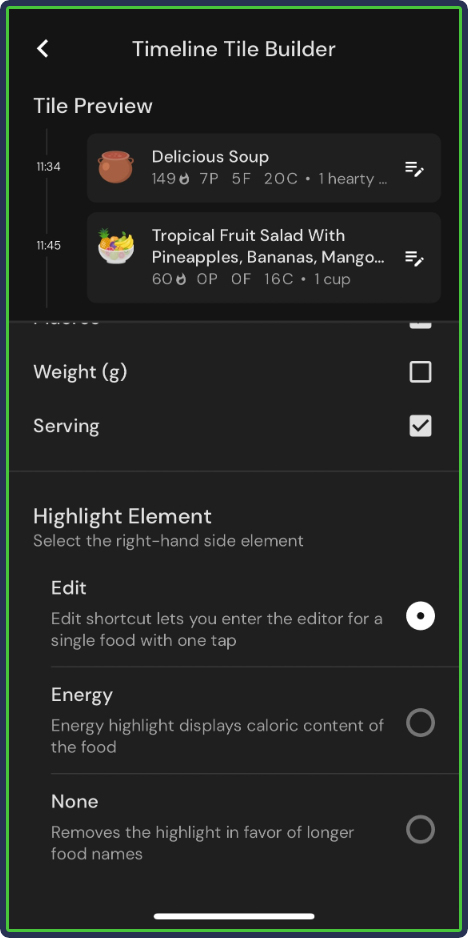
4. Set the Right Goals
The beauty of MacroFactor is that it allows you to set goals during the setup process and adjust them afterward if necessary.
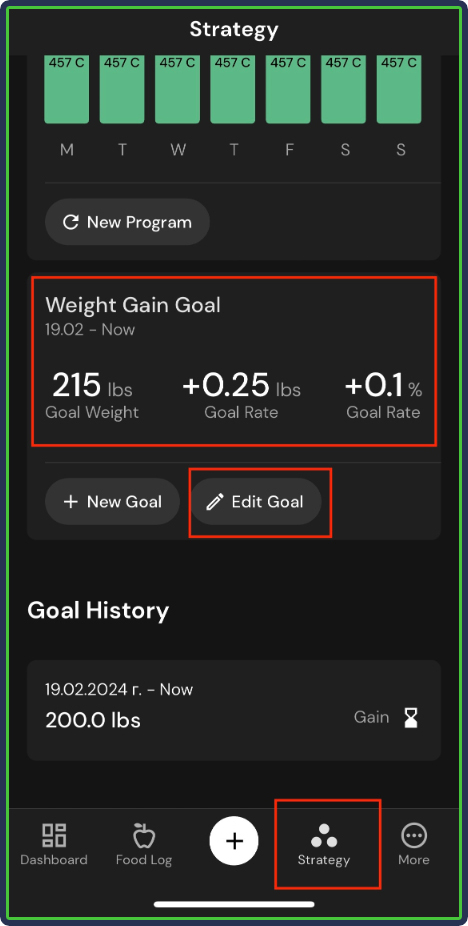
To adjust a goal, go to ‘Strategy’ (bottom right) and navigate to your goal, where you will see an ‘Edit Goal’ button:
You can then adjust the speed of your preferred weight gain or loss, and the app will automatically adjust your calorie and macro targets:
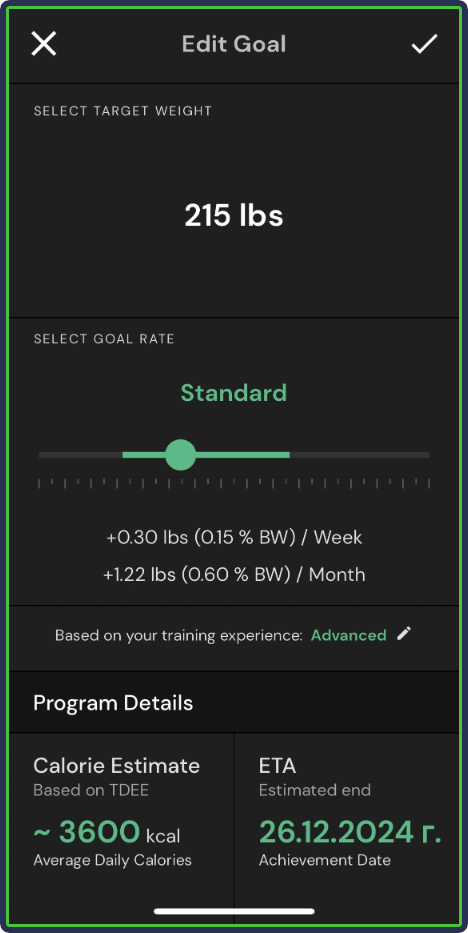
However, it’s important to consider the pros and cons of each goal you set.
As Greg puts it:
“If you set a goal to lose 3lbs per week, don’t be surprised if your calorie targets are really low.”
5. Create a New Program if Necessary
Another thing you can do to personalize your MacroFactor experience even more is to create a new program if you’re not entirely satisfied with the current one.
This means going through a partial setup process, where you answer a few questions again:
- What is your preferred diet type?
- What is your preferred calorie floor?
- What type of training you will do?
- Would you like to shift calories or get an even distribution?
- What is your preferred protein intake?
The above questions are for a ‘Coached’ program (which I discussed above), where the app does all the calculations for you.

You can also pick a ‘Collaborative ’-style program, where you can set your macro targets more freely.
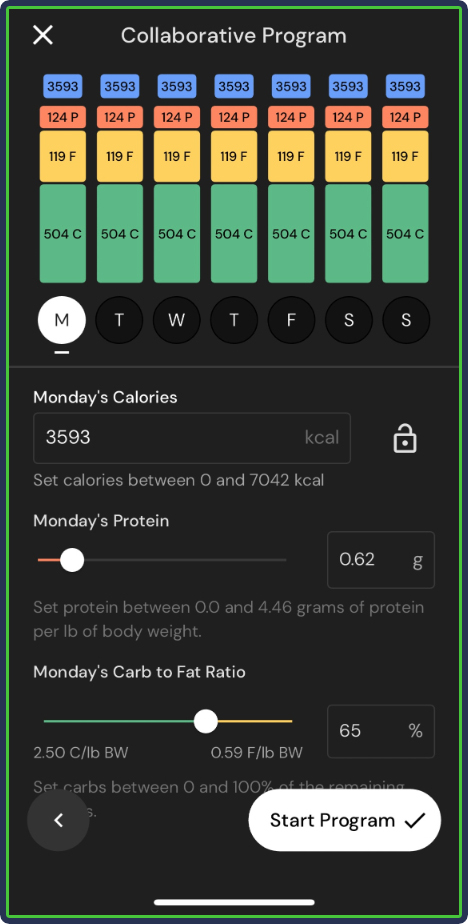
Here’s what Greg had to say about this personalization option:
“Don’t be afraid to create a new program if you want a different mix of fat and carbs, or if your protein target is higher or lower than you want. I also think collaborative plans are underutilized by people who want more control over their daily nutrient targets.”
6. Configure Your Shortcuts
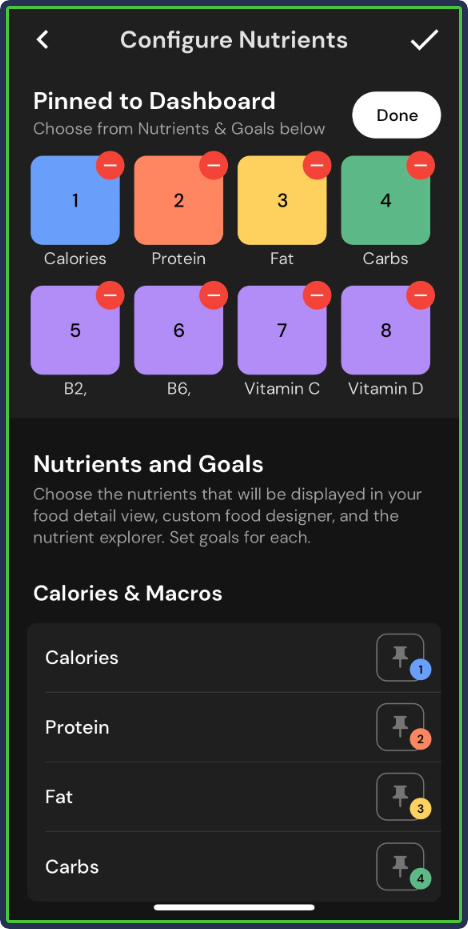
As mentioned, MacroFactor allows you to pin up to eight things to track in your dashboard.
This could be your calories, macros and several micronutrients, just micronutrients, water intake, fiber, or even certain amino acids and fatty acids.
MacroFactor is quite flexible in this regard, and you can get a lot of value even if you need to track certain nutrients for health reasons.
To configure what the app shows on the home screen, scroll down to ‘Nutrient Explorer,’ click ‘Explore All,’ and tap the gear icon on the top right.
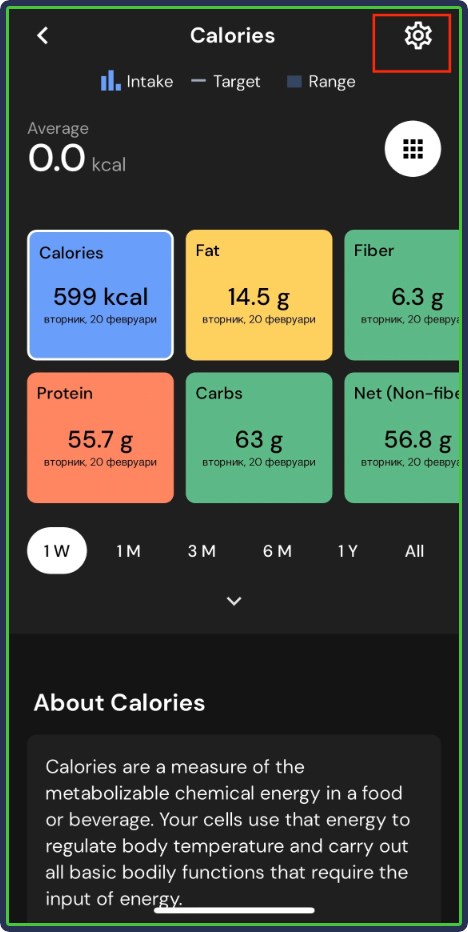
You will see the ‘Pinned to Dashboard’ selection and a button to edit it:
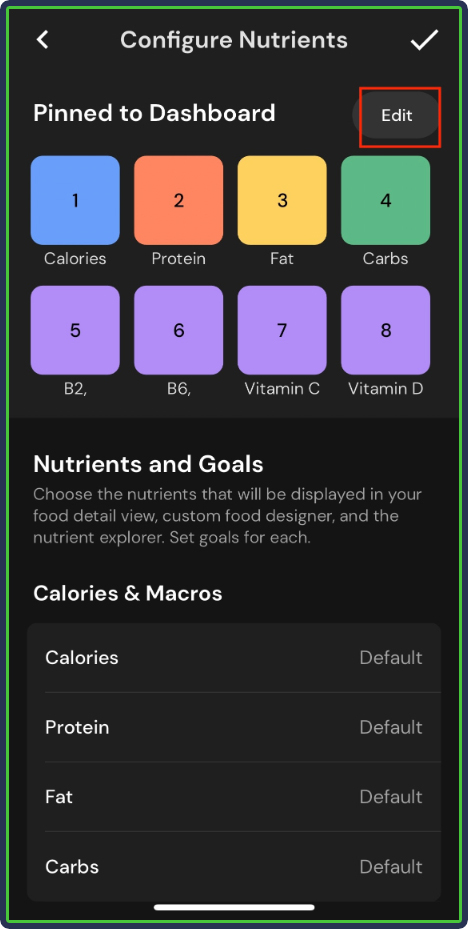
Tap it and pin or remove metrics to get your personalized dashboard view.
Other Macro Tracking Resources
About The Author

Philip Stefanov is a certified conditioning coach, personal trainer, and fitness instructor. With more than nine years of experience in the industry, he’s helped hundreds of clients improve their nutritional habits, become more consistent with exercise, lose weight in a sustainable way, and build muscle through strength training. He is passionate about writing and has published more than 500 articles on various topics related to healthy nutrition, dieting, calorie and macronutrient tracking, meal planning, fitness and health supplementation, best training practices, and muscle recovery.
Why Trust Our Content

On Staff at FeastGood.com, we have Registered Dietitians, coaches with PhDs in Human Nutrition, and internationally ranked athletes who contribute to our editorial process. This includes research, writing, editing, fact-checking, and product testing/reviews. At a bare minimum, all authors must be certified nutrition coaches by either the National Academy of Sports Medicine, International Sport Sciences Association, or Precision Nutrition. Learn more about our team here.
Have a Question?
If you have any questions or feedback about what you’ve read, you can reach out to us at [email protected]. We respond to every email within 1 business day.
